pfSense, UniFi, & VLANS: a tale of three toddlers
Nov. 13, 2023Hi all! After a long and troublesome battle against the gods of networking and the intricacies of pfSense, I have
finally developed a process (that I understand, at least) for initialising an ETHX port to pass VLAN traffic that is
tagged externally by a switching device (in my case, a USW-PRO 48PoE UniFi managed
switch).
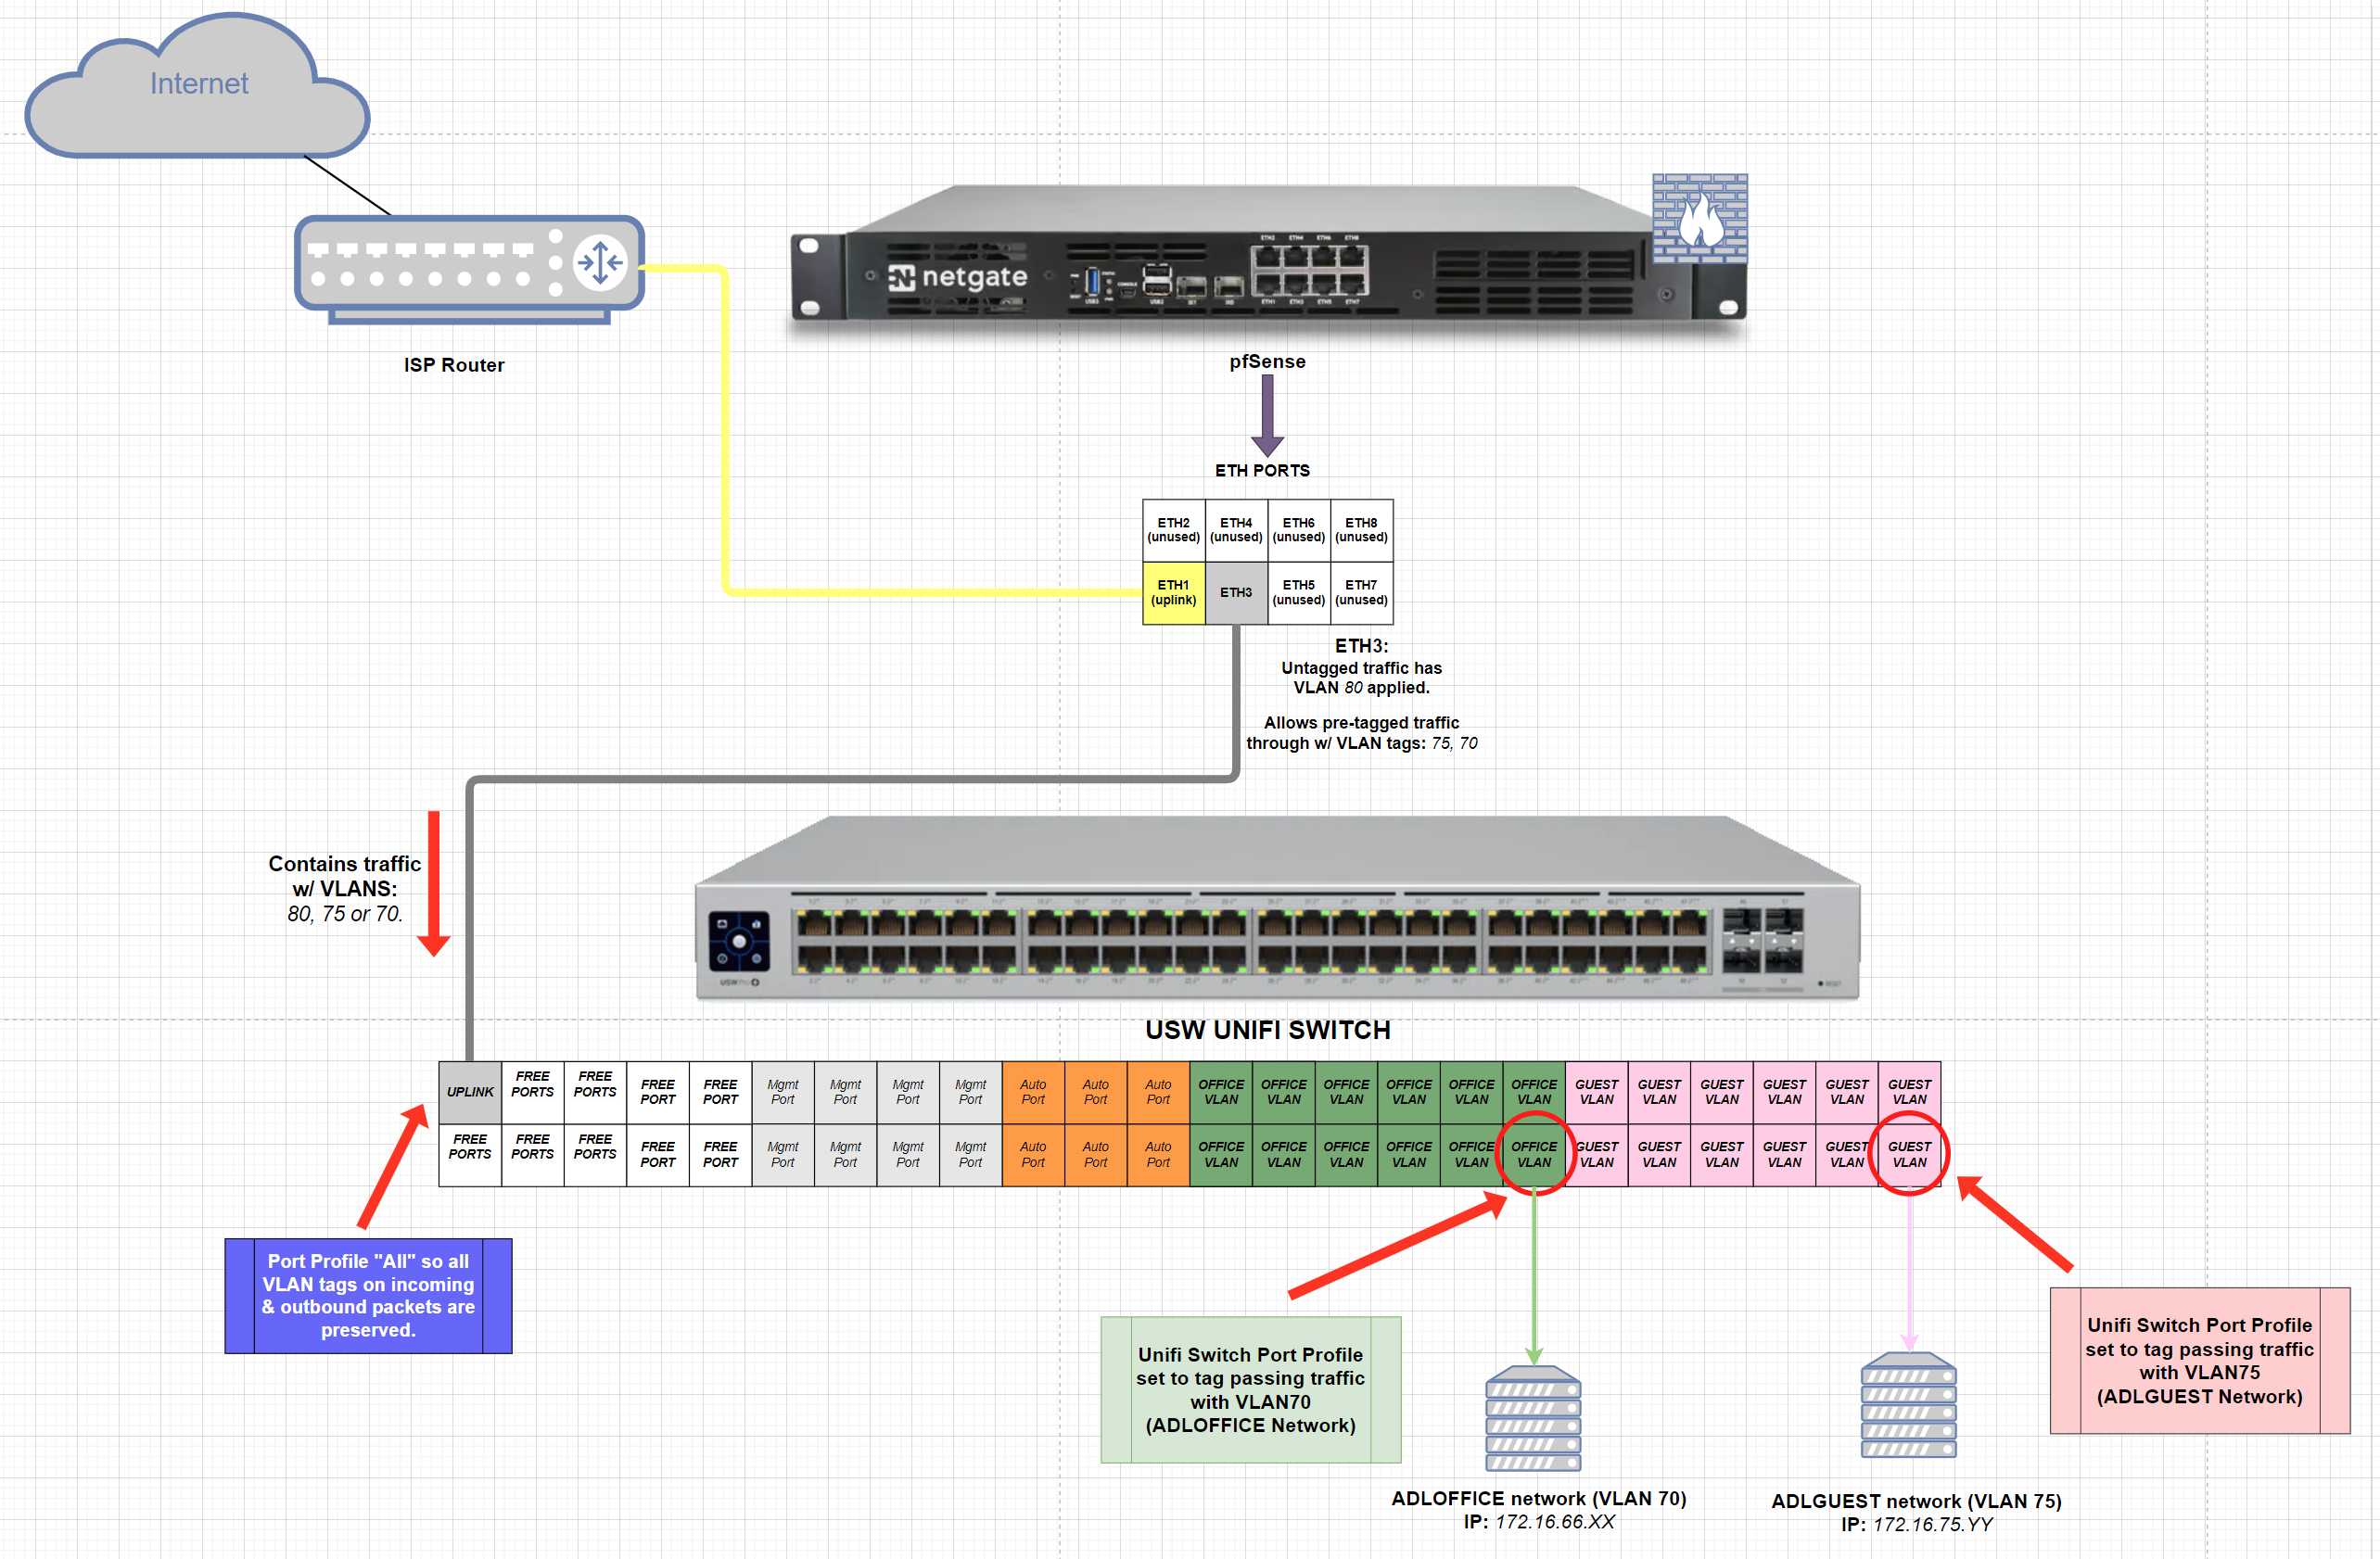
In the hope that this can be of use to others out there, I have written up my process for doing so below. But first, here is a contextual network diagram for my setup:
- Steps taken:
-
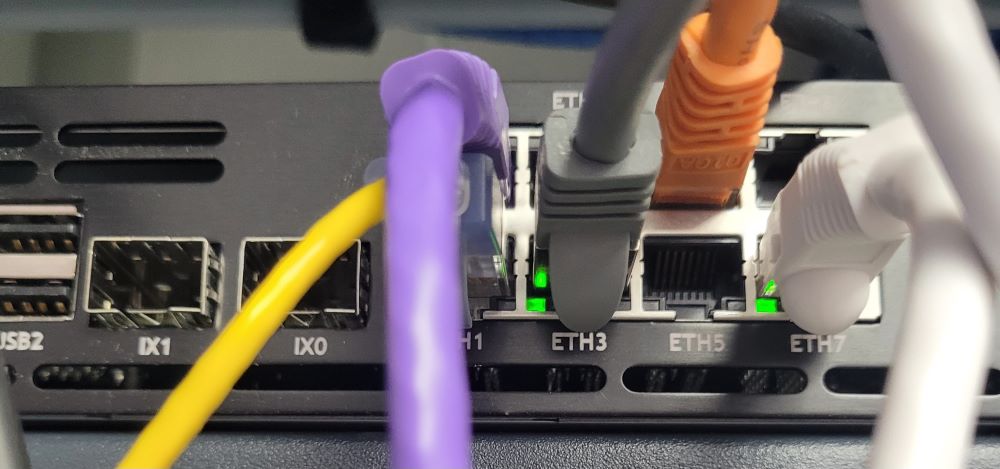
Plug in an ethernet cable to an unused port on the pfSense box. In my case, this is ETH3 (gray cable).
-
Login to the pfSense router GUI via the browser (default address is
192.168.0.1, orXXX.XXX.XXX.1depending on how you’ve setup the management LAN it’s on), and navigate to Interfaces / Switches / Ports.
-
Check the targeted port ETH3 is ACTIVE, and then edit the Port VID to be whatever VLAN tag you want to be applied to passing UNTAGGED traffic by DEFAULT. For ex,
Port VID = 80will mean any untagged passing traffic through ETH3 gets a VLAN tag of80.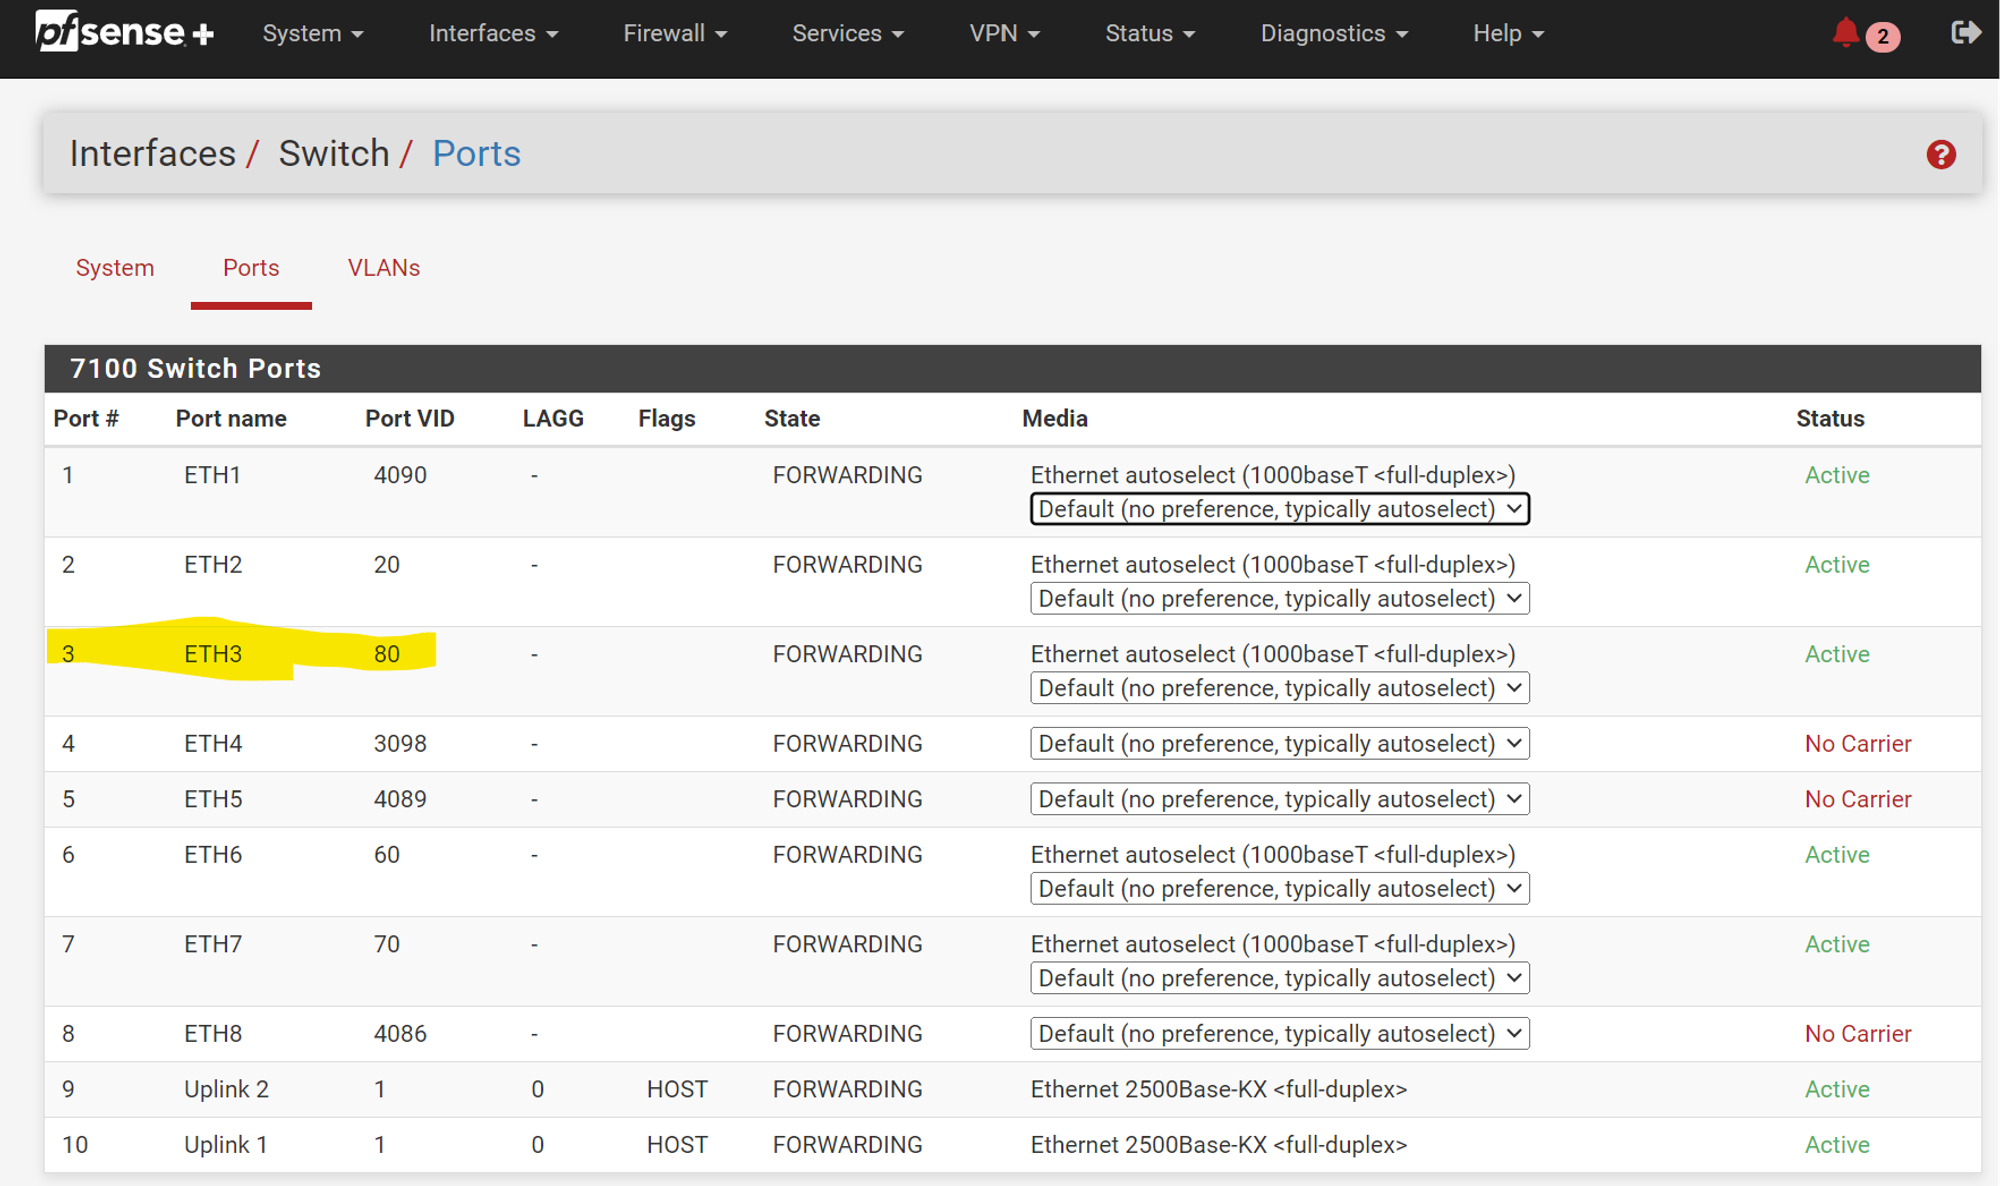
-
Interfaces / Switches / VLANs: Click
+ Add TagAdd whatever VLAN tag you wish to target (in this case
80), give it a description, and add the Members, AKA the numbered ETH ports on the pfSense (ETH1 to ETH10) that will allow this VLAN through.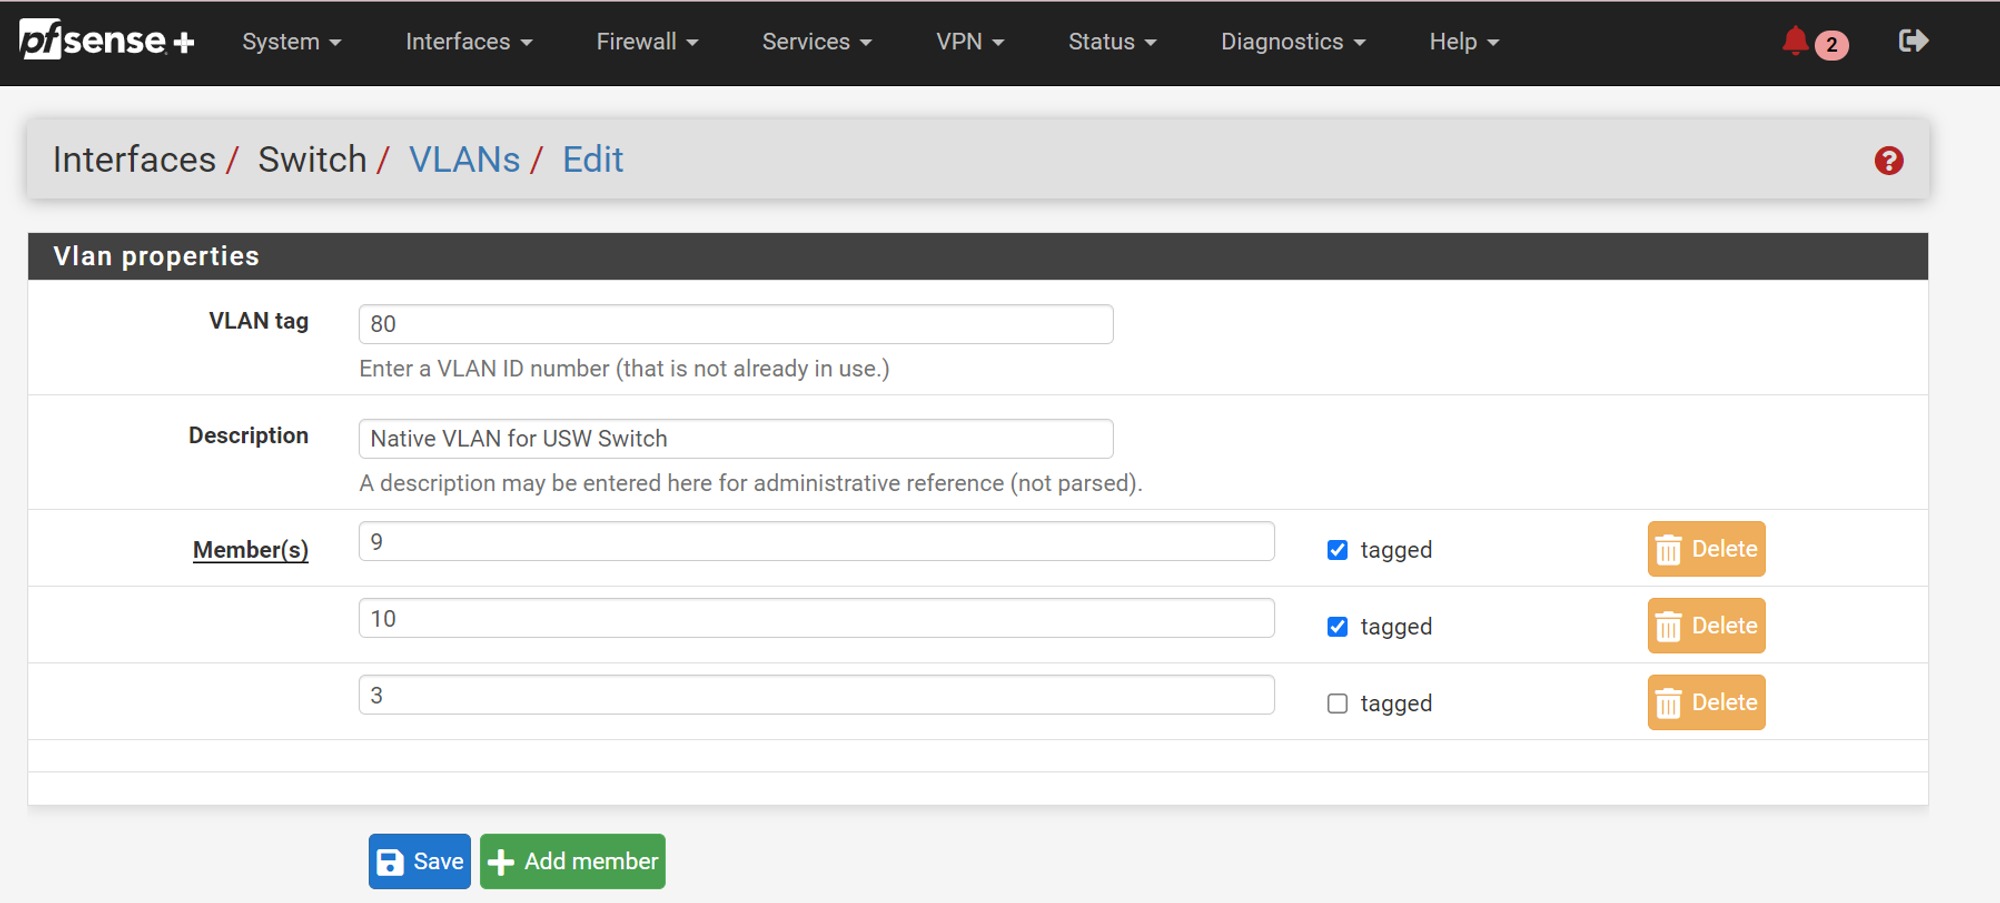

I have added ETH3 as a member, and told pfSense to expect the traffic passing through to be untagged. This means that any untagged traffic through ETH3 will be assigned a VLAN tag of 80 (ETH3’s Port VID, as specified in Step 1). Don’t forget to click
Save.NOTE: ALWAYS ADD 9 & 10 as tagged members by default (WHY this must be done is beyond the scope of this tutorial but perhaps write an article about it soon as it explains a lot about how the internals of pfSense actually functions. alternatively, for the curious, read the docs here)
Key:
9t= Port 9, expecting & passing VLAN-tagged traffic ONLY.3= Port 3, expecting & passing untagged traffic ONLY. -
Interfaces / Assignments / VLANs. Click
+ Add: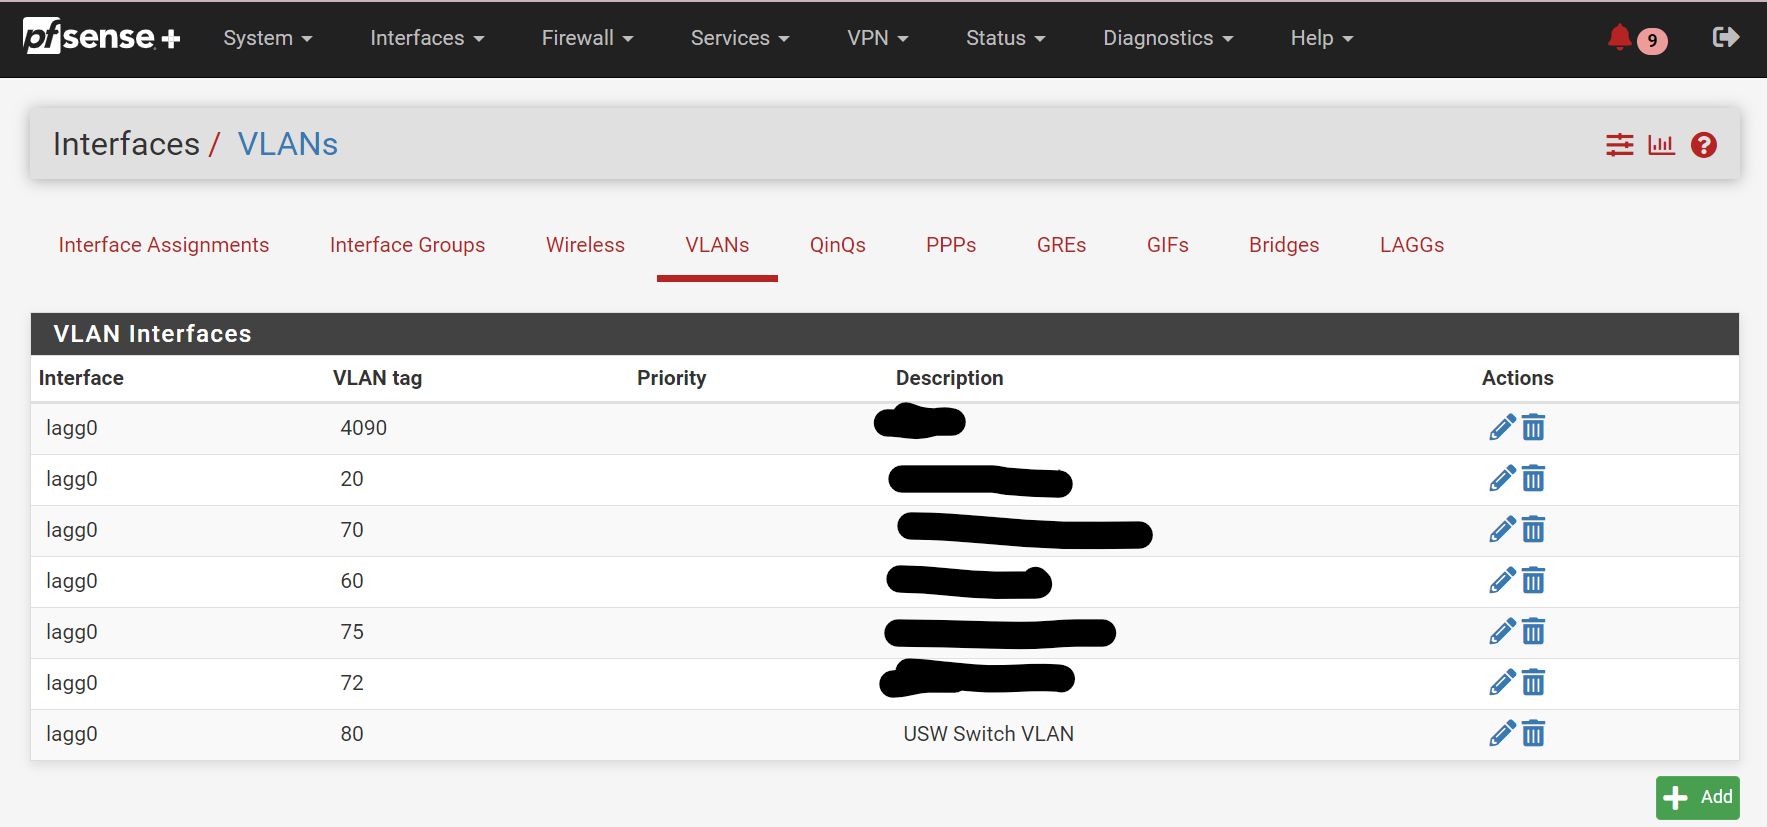
For Parent Interface, select whatever interface corresponds to
ETH3, or alagggroup it’s part of (if any have been created by default/you). In my case, I havelagg0bundling connections from ETH1-8 for load balancing purposes, so it’s my parent interface.Assign it the desired VLAN tag (
80in my case) and give it a description before pressingSave.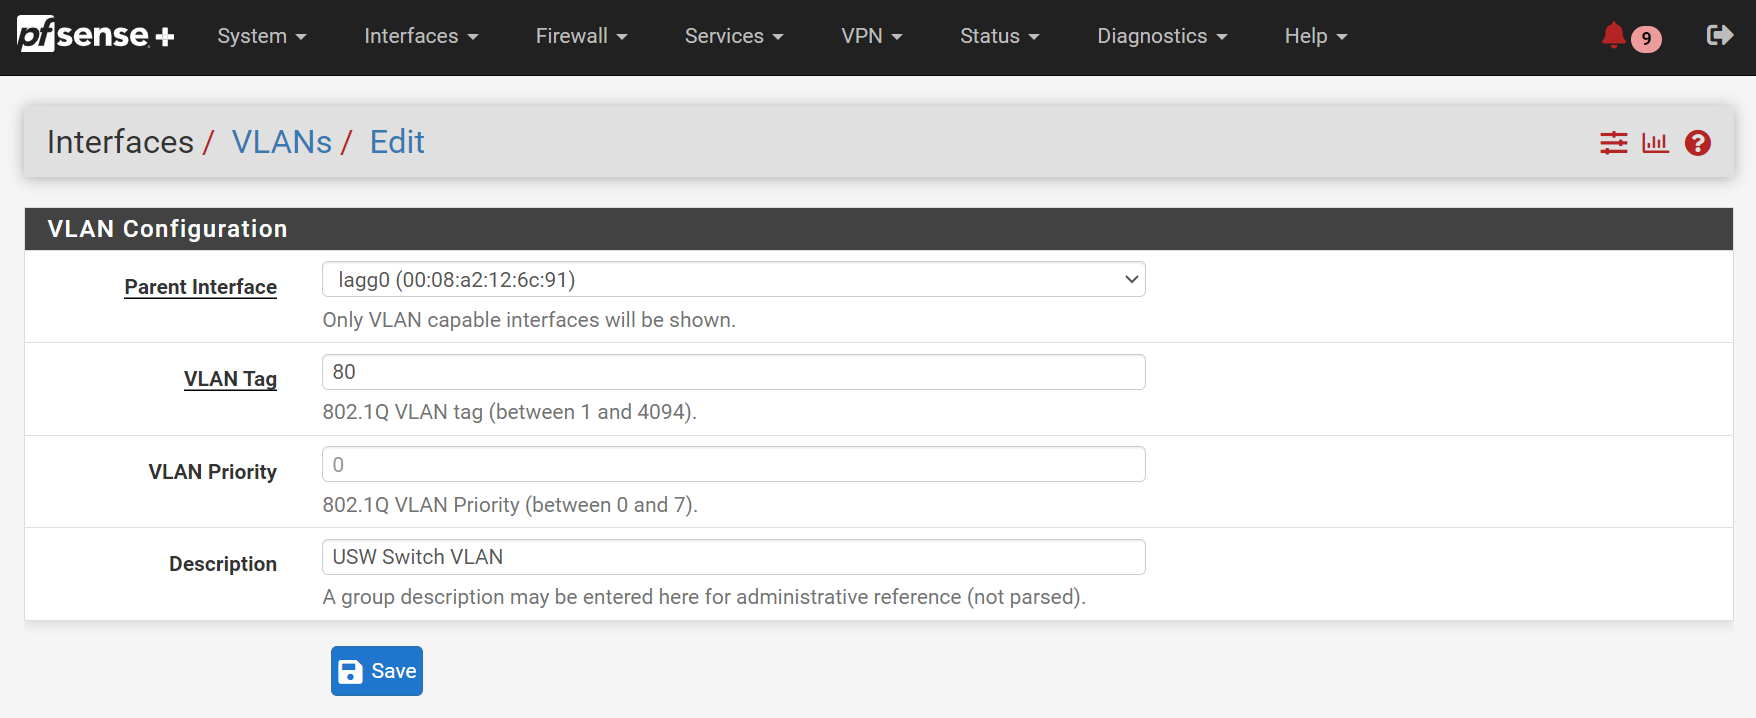
-
Interfaces / Interface Assignments:
You should now be able to select the VLAN you created from the dropdown next to Available Network Ports, and click
+ Addto assign it to an Interface.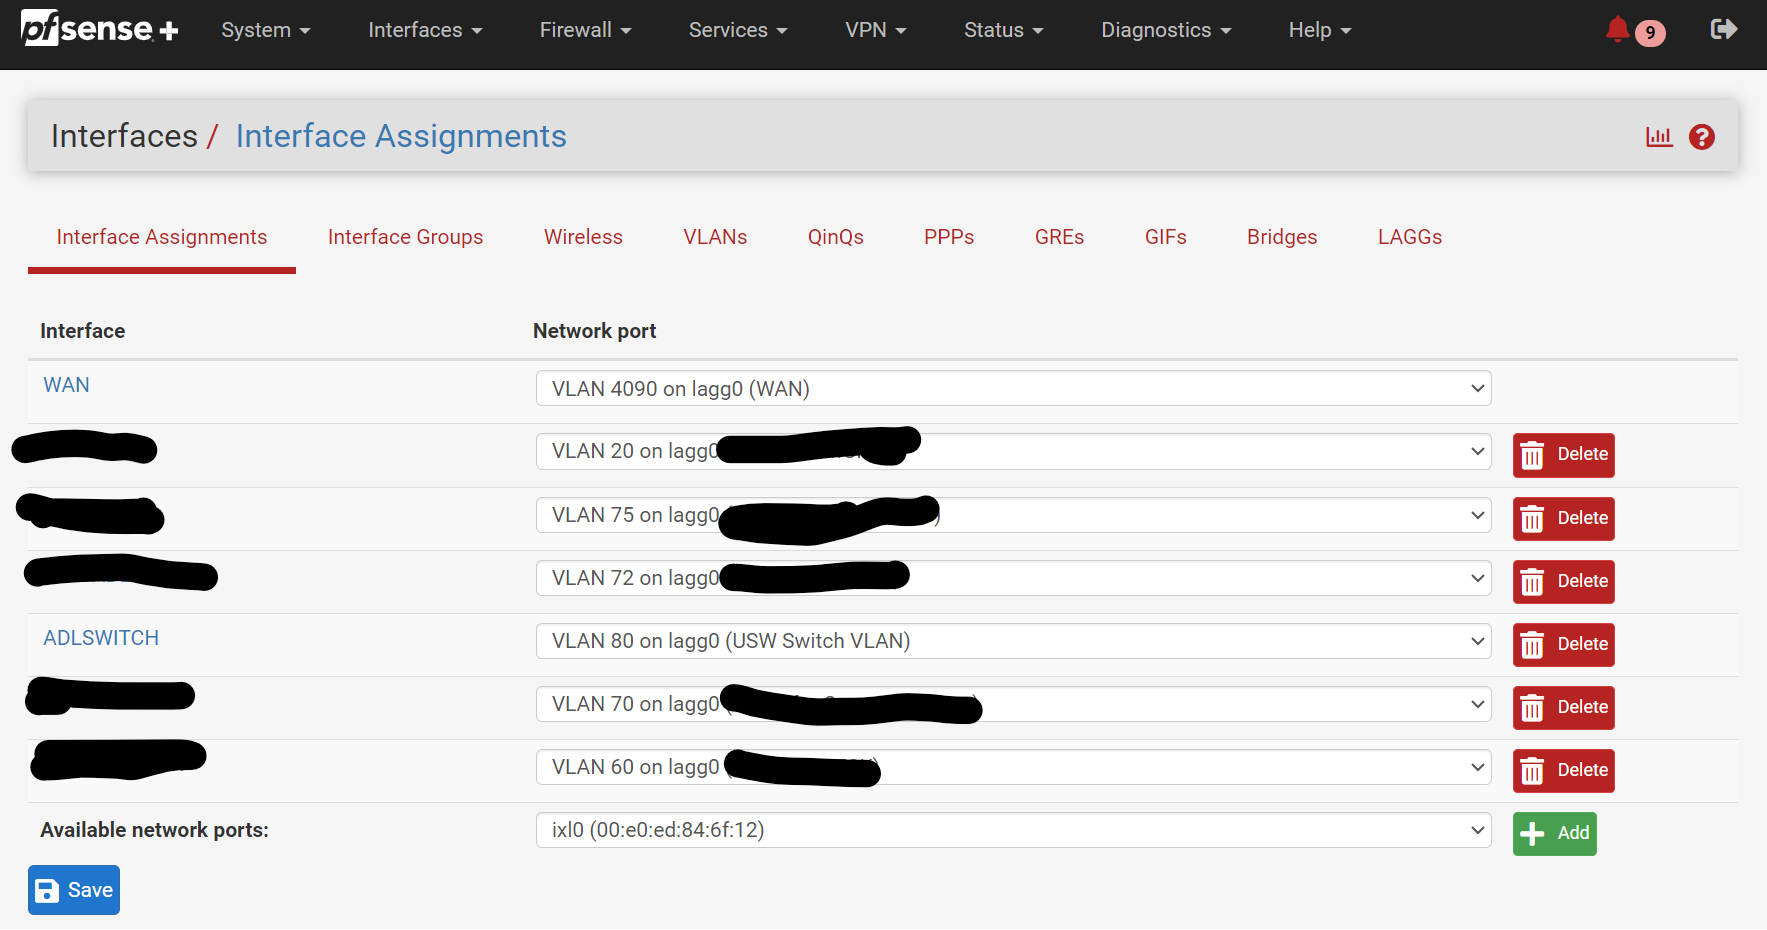
You can then set up the interface by clicking on the blue link, assigning an ip type, range, and other cool stuff. I set this interface (& thus
VLAN 80) to have an ip range of192.168.80.X/24. This can be any ip address as long as it doesn’t encroach on any other existing interface ranges, but I recommend sticking within the conventional ranges for unrouted private networking to avoid confusing things (192.168.0.0, 172.16.0.0 and 10.0.0.0).Then tick
Enable Iterfaceand pressSave.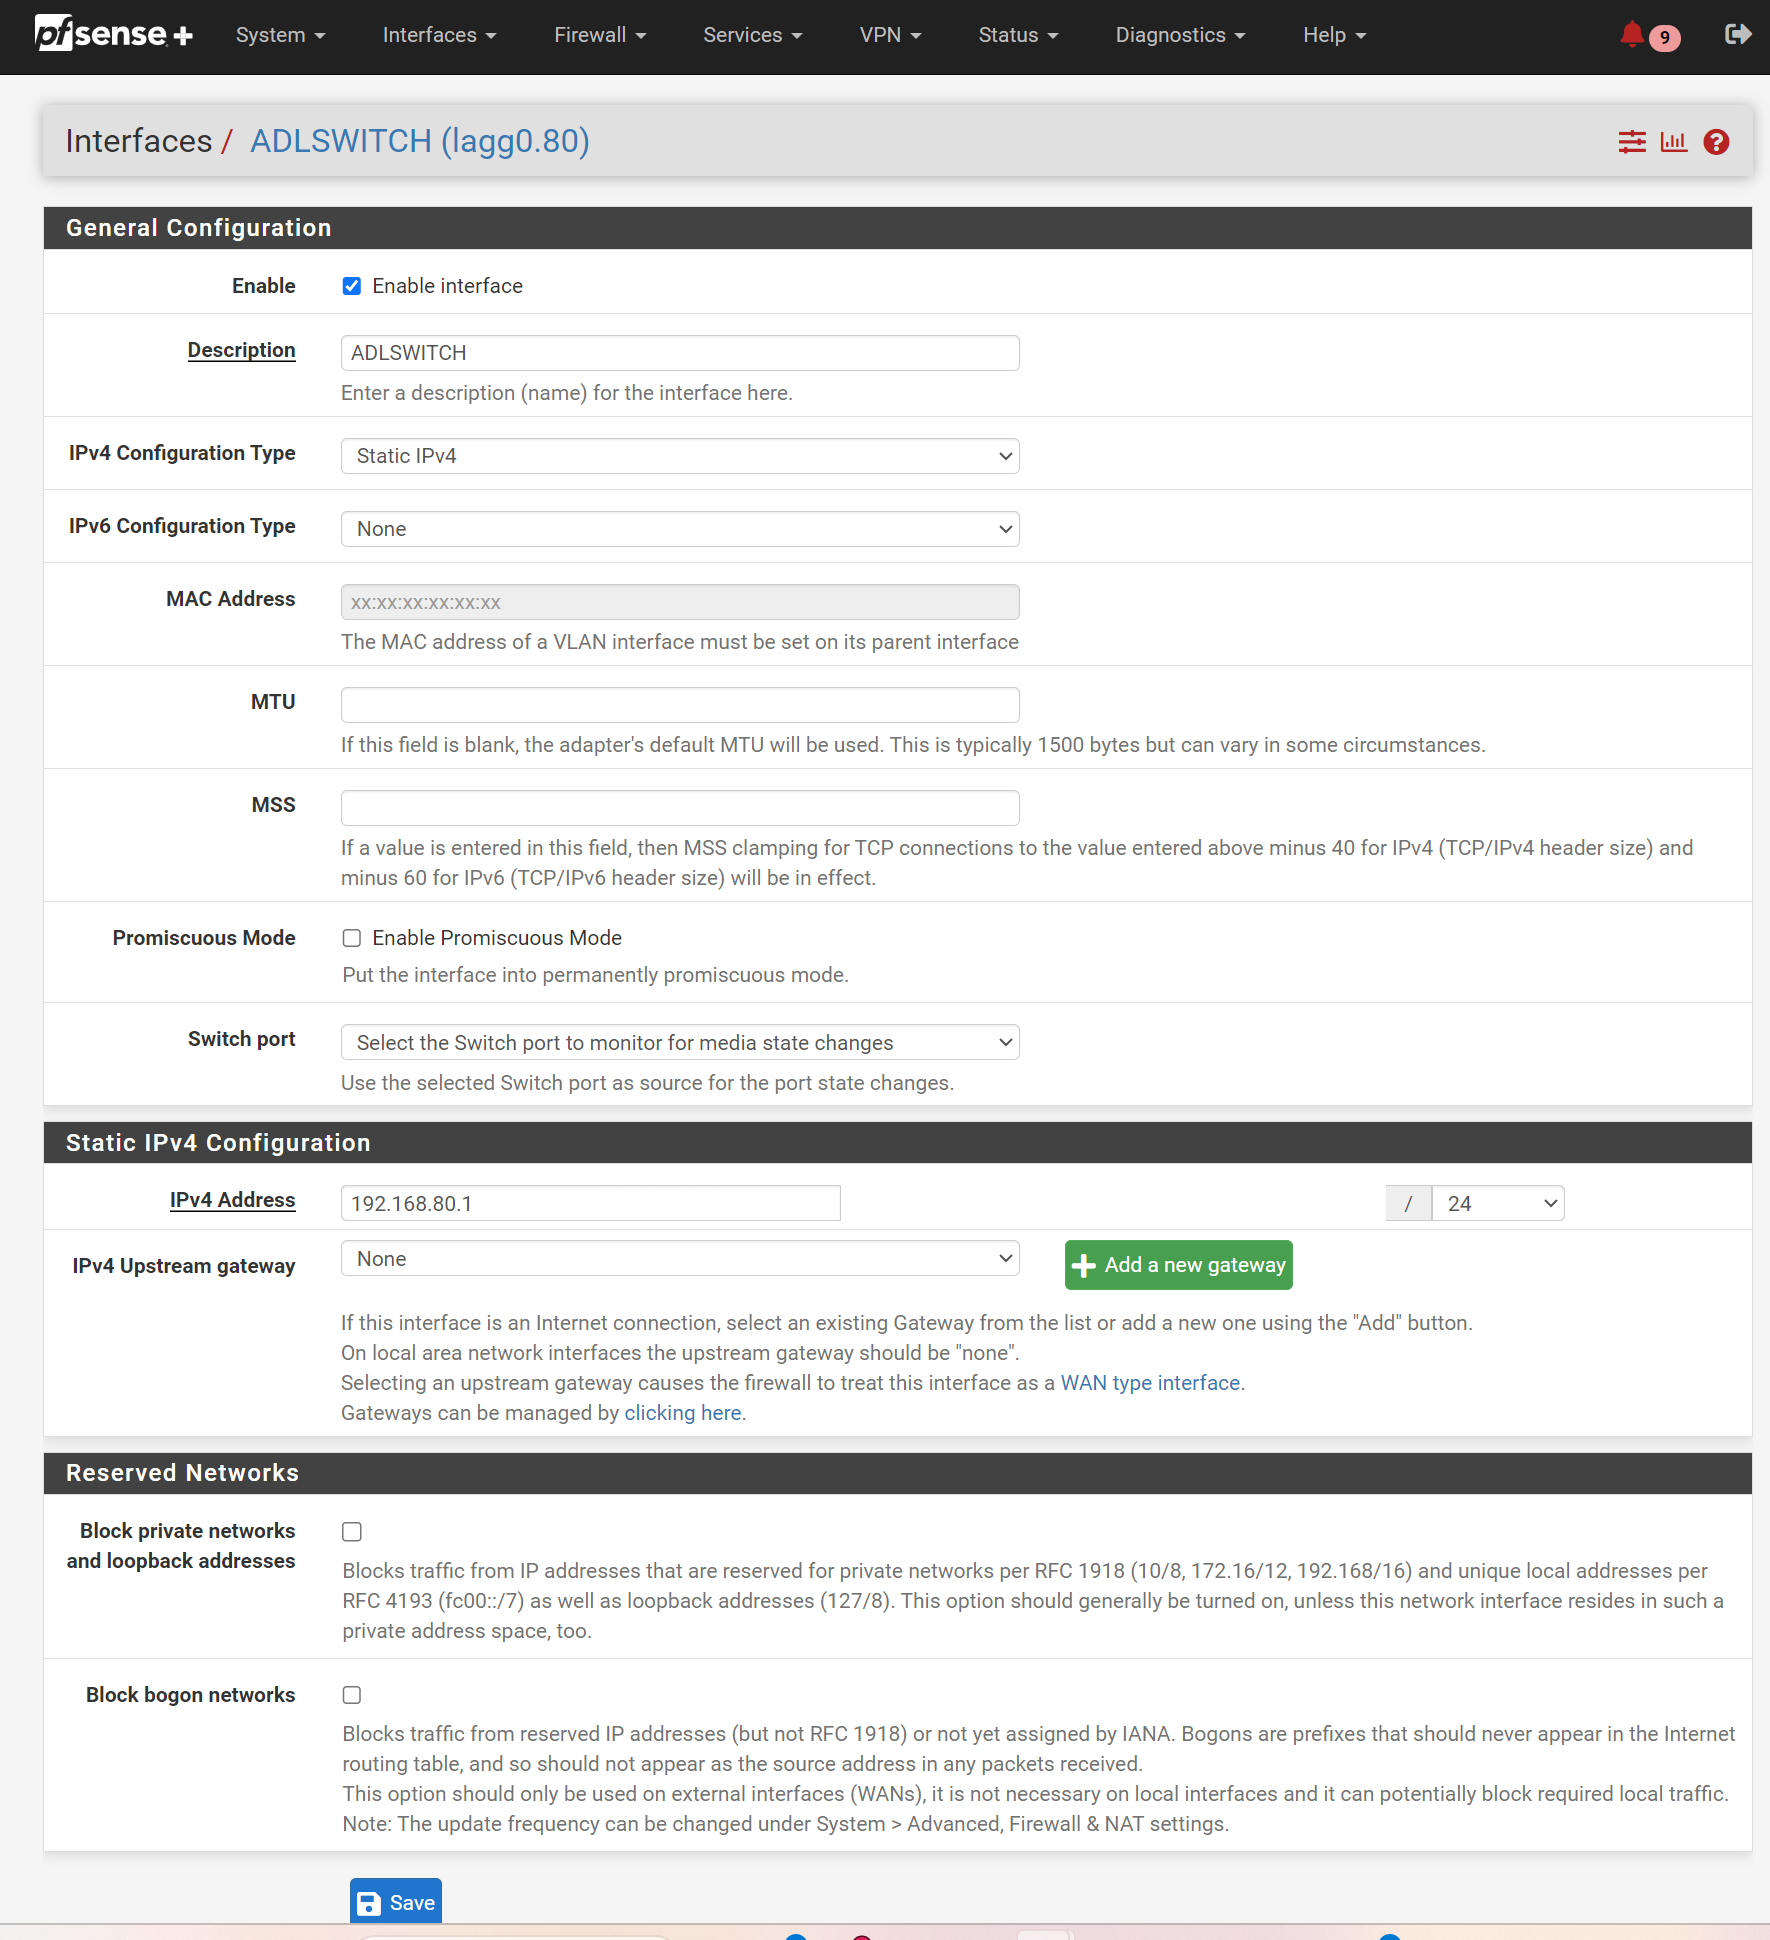
Don’t forget to
Apply Changesbefore navigating away!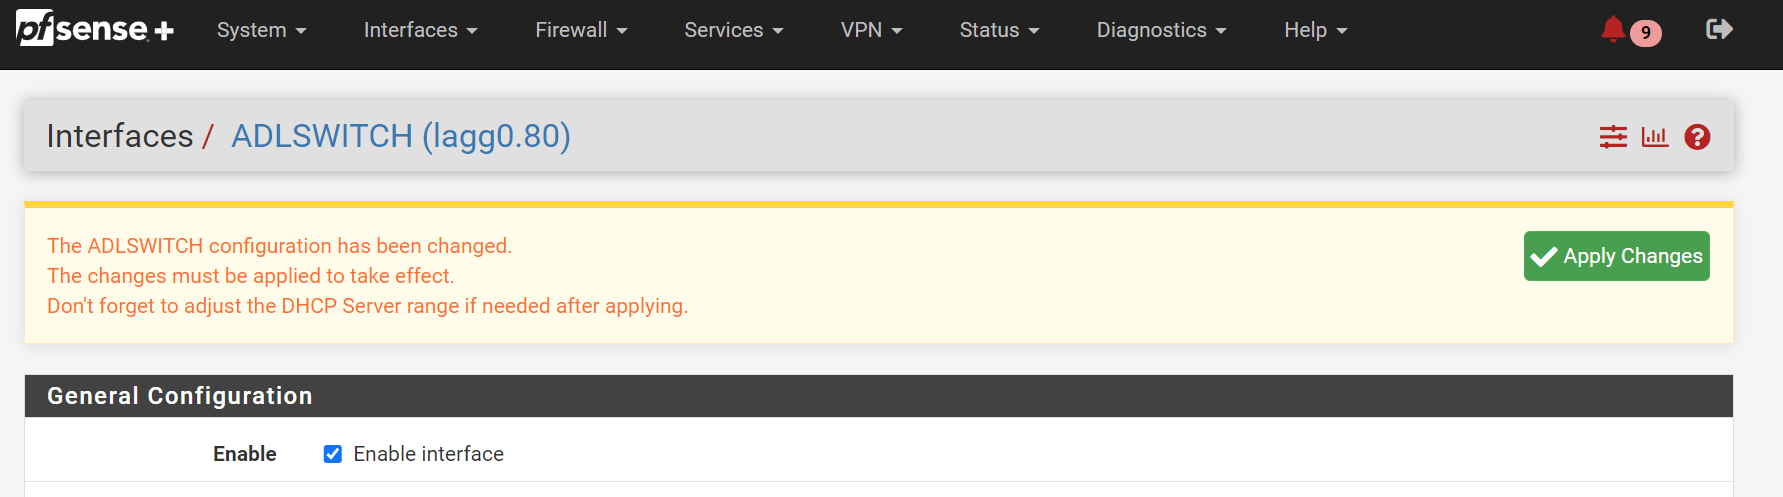
-
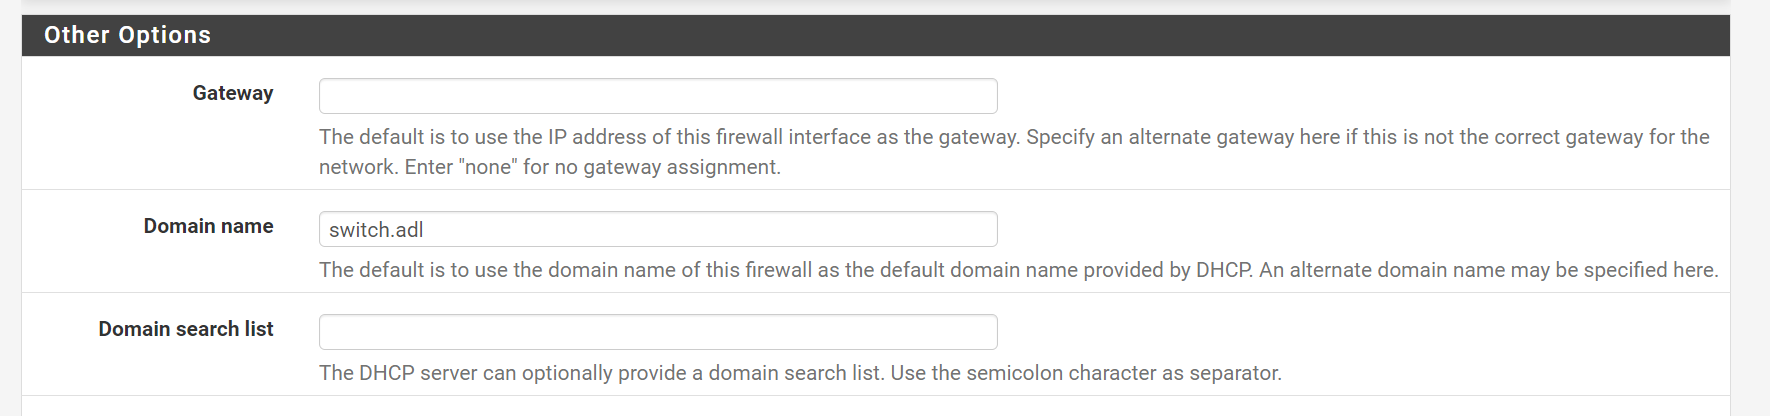
Navigate to Services / DHCP Server and select the interface name you just created (
ADLSWITCHfor me).Here, we can set the pool of IP addresses this interface will assign to connected devices on
VLAN 80, as well as any other custom settings. The only one I set was Domain Name toswitch.adl, to make it nice and easy to see which network I am on if I do anipconfig/ifconfigfrom a connected device.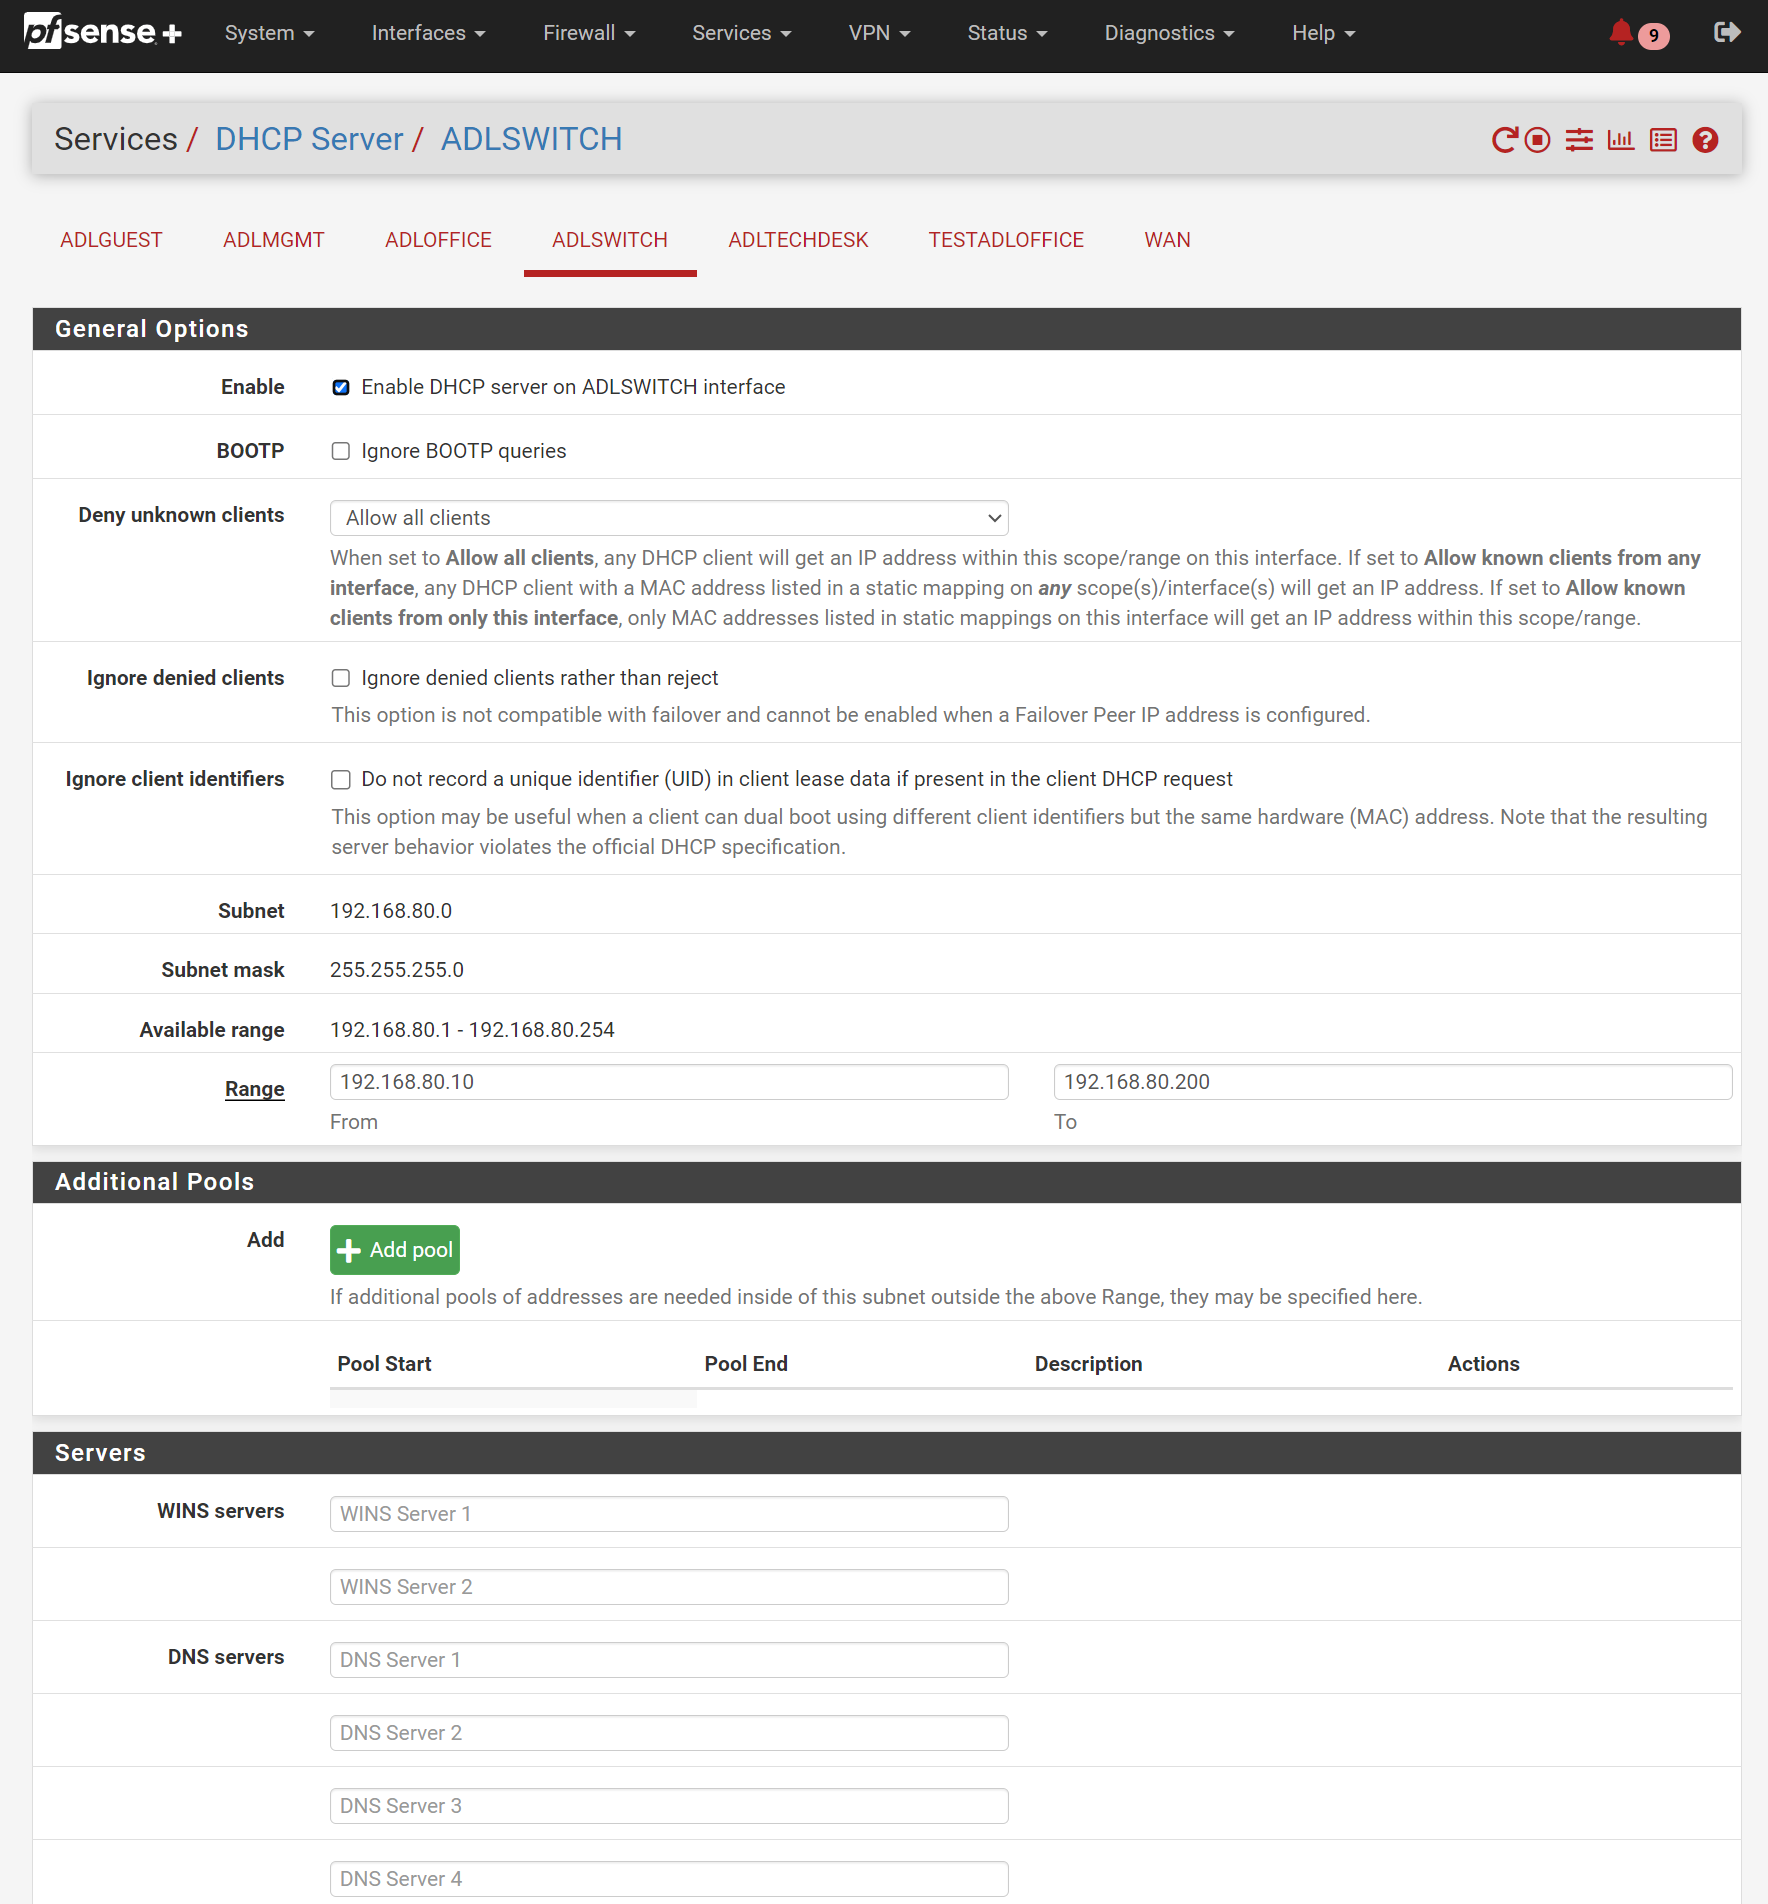
Then scroll down to the bottom and click
Save. -
Navigate to Firewall / Rules, and select the interface name you just created (
ADLSWITCHfor me). Click onAddto create a temporary “allow all” rule to test the configuration works.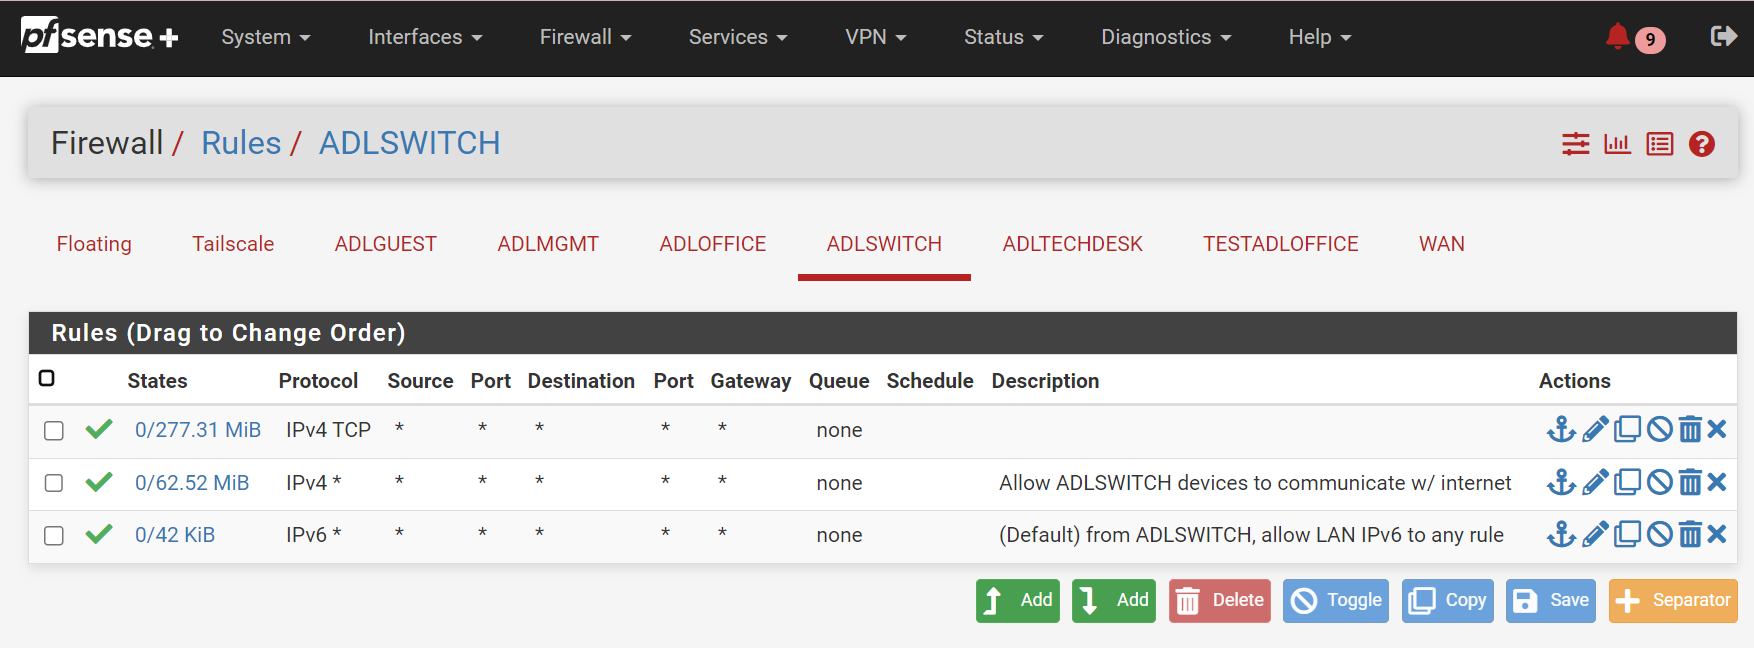
Use the following settings:
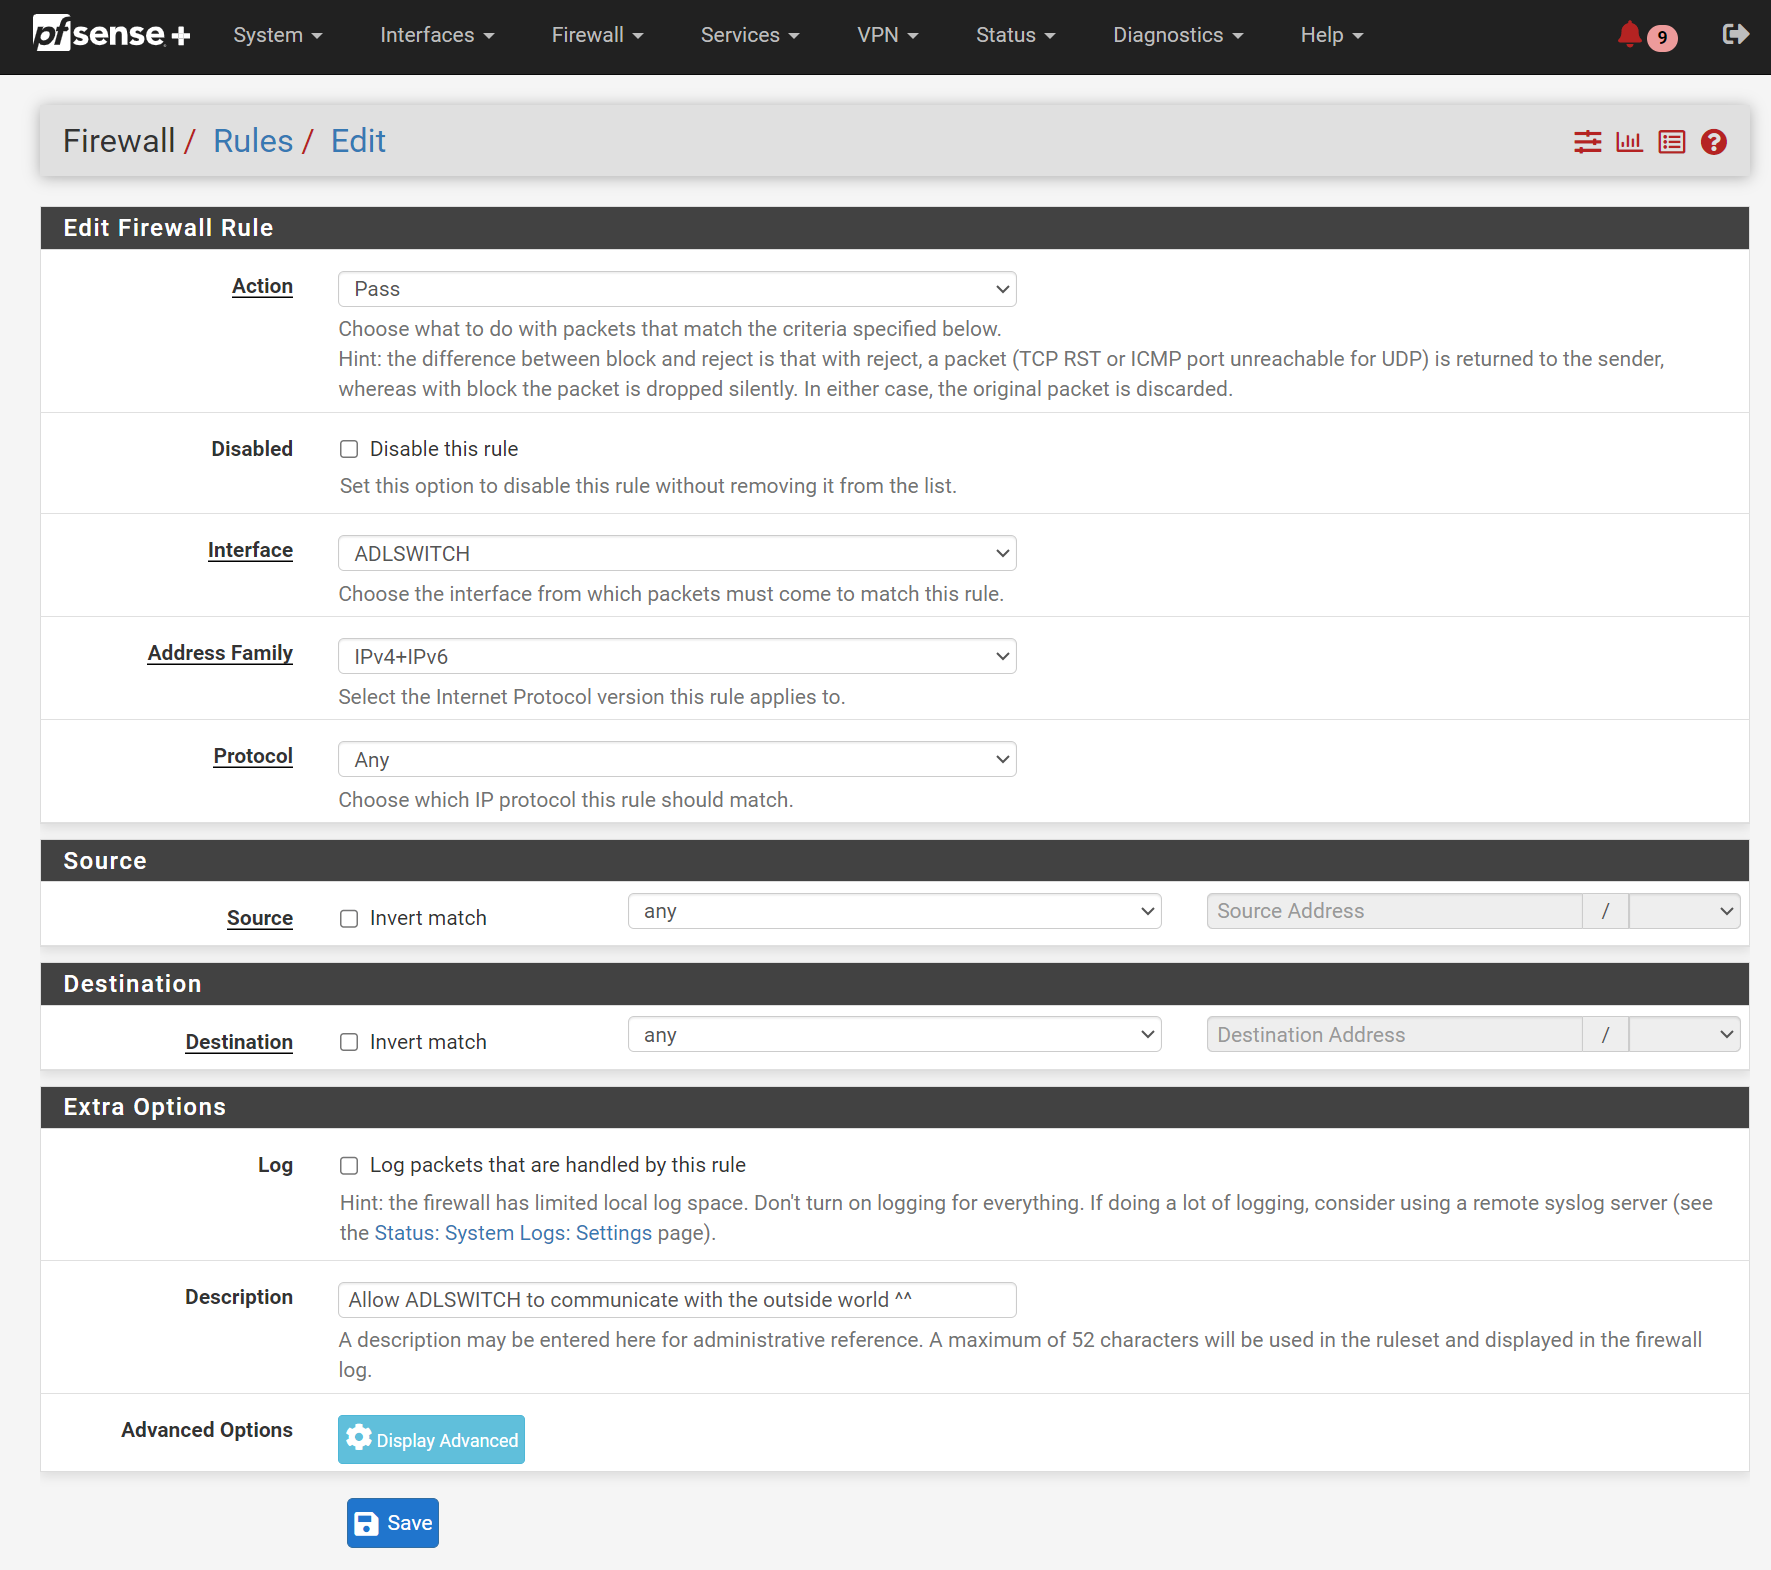
🔥 Don’t forget to harden your firewall later, based on your use case and security purposes! 🔥
-
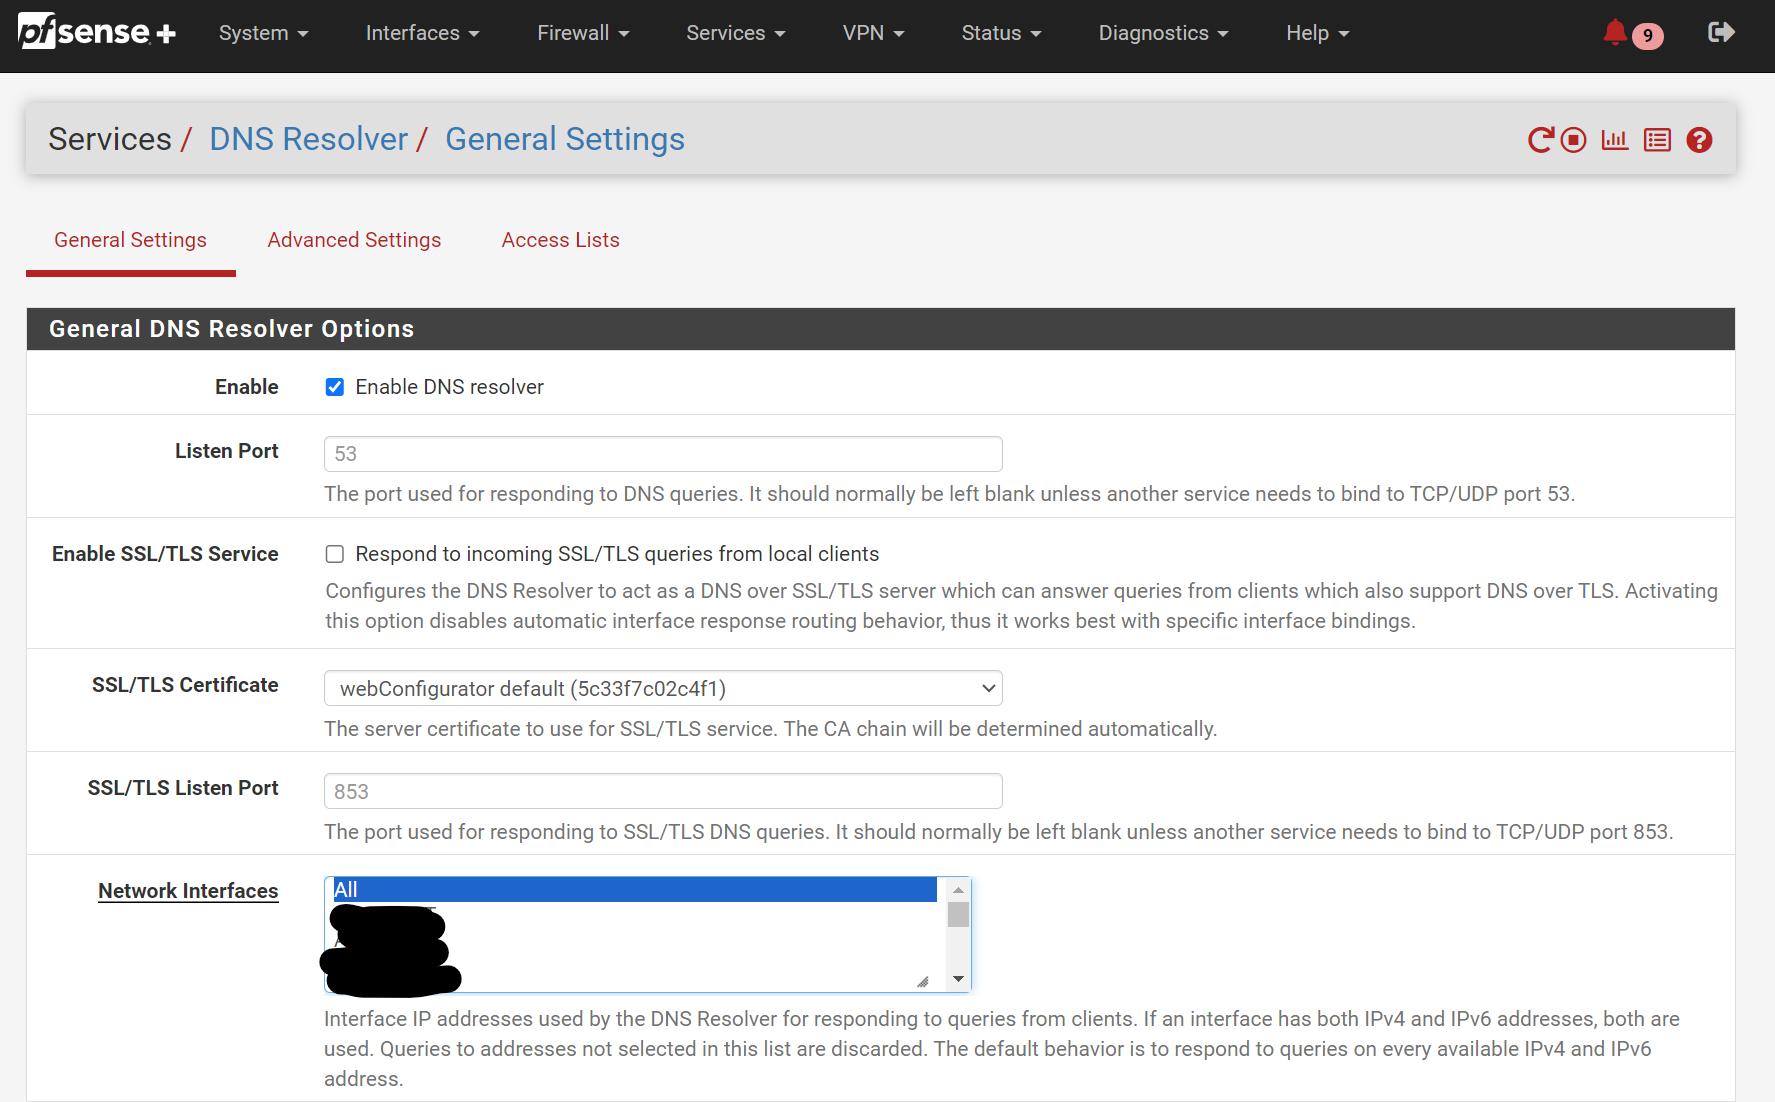
Go to Services / DNS Resolver and check that Network Interfaces has “All” selected. This is very important - and will ensure the DNS Resolver will know to look for and operate on your new network interface.
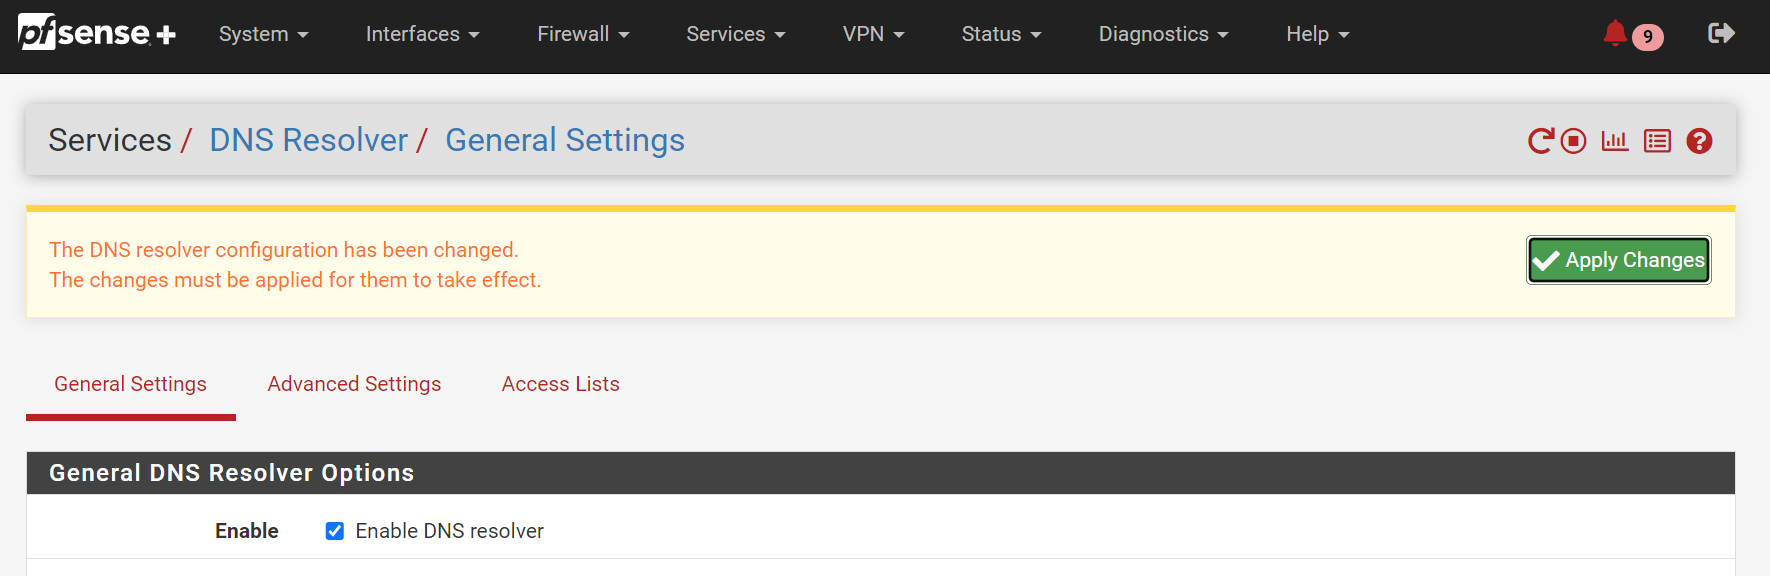
Scroll down and press
Save, THEN scroll back up and pressApply Changesat the top of the page.
-
From here, you should now have a functioning VLAN setup, managed by pfSense. Give yourself a pat on the back and have a cookie, you’ve earned it ~ 🍪!
Now, referring back to my network diagram, I want to also setup a UniFi USW switch to assign VLANs to devices based on the port they’re plugged into.
- Assigning VLANs based on port in UniFi:
-
Connect a factory-reset USW switch to the end of the ethernet cable plugged into
ETH3, and the switch SHOULD receive an IP on the IP range you specified forVLAN 80above (for me,192.168.80.X/24), if you’ve followed the above steps correctly (and you sacrificed at least two goats to the networking gods earlier that day) -
From there you can follow the normal process of adopting the switch to a UniFi controller like here, but my use case was a little more compex.
If you want to adopt the switch to a remote UniFi controller like I did (i.e. one that is hosted on another LAN/remote network, for example
172.16.66.X/24), connect a laptop to the USW switch, make sure it receives an IP on the same network as the switch (in my case, the one usingVLAN 80-192.168.80.X/24), and then ssh into the switch with default credsubnt/ubnte.g
ssh ubnt@[ip-of-switch]& then enterubntwhen prompted for the password. -
Issue the command:
set-inform http://ip-of-host:8080/informto direct the switch to the IP of your unifi cloud controller. (e.g. the command I ran wasset-inform http://172.16.66.35:8080/inform)Make sure this address is reachable from VLAN 80’s network by adjusting pfSense firewall rules !!
-
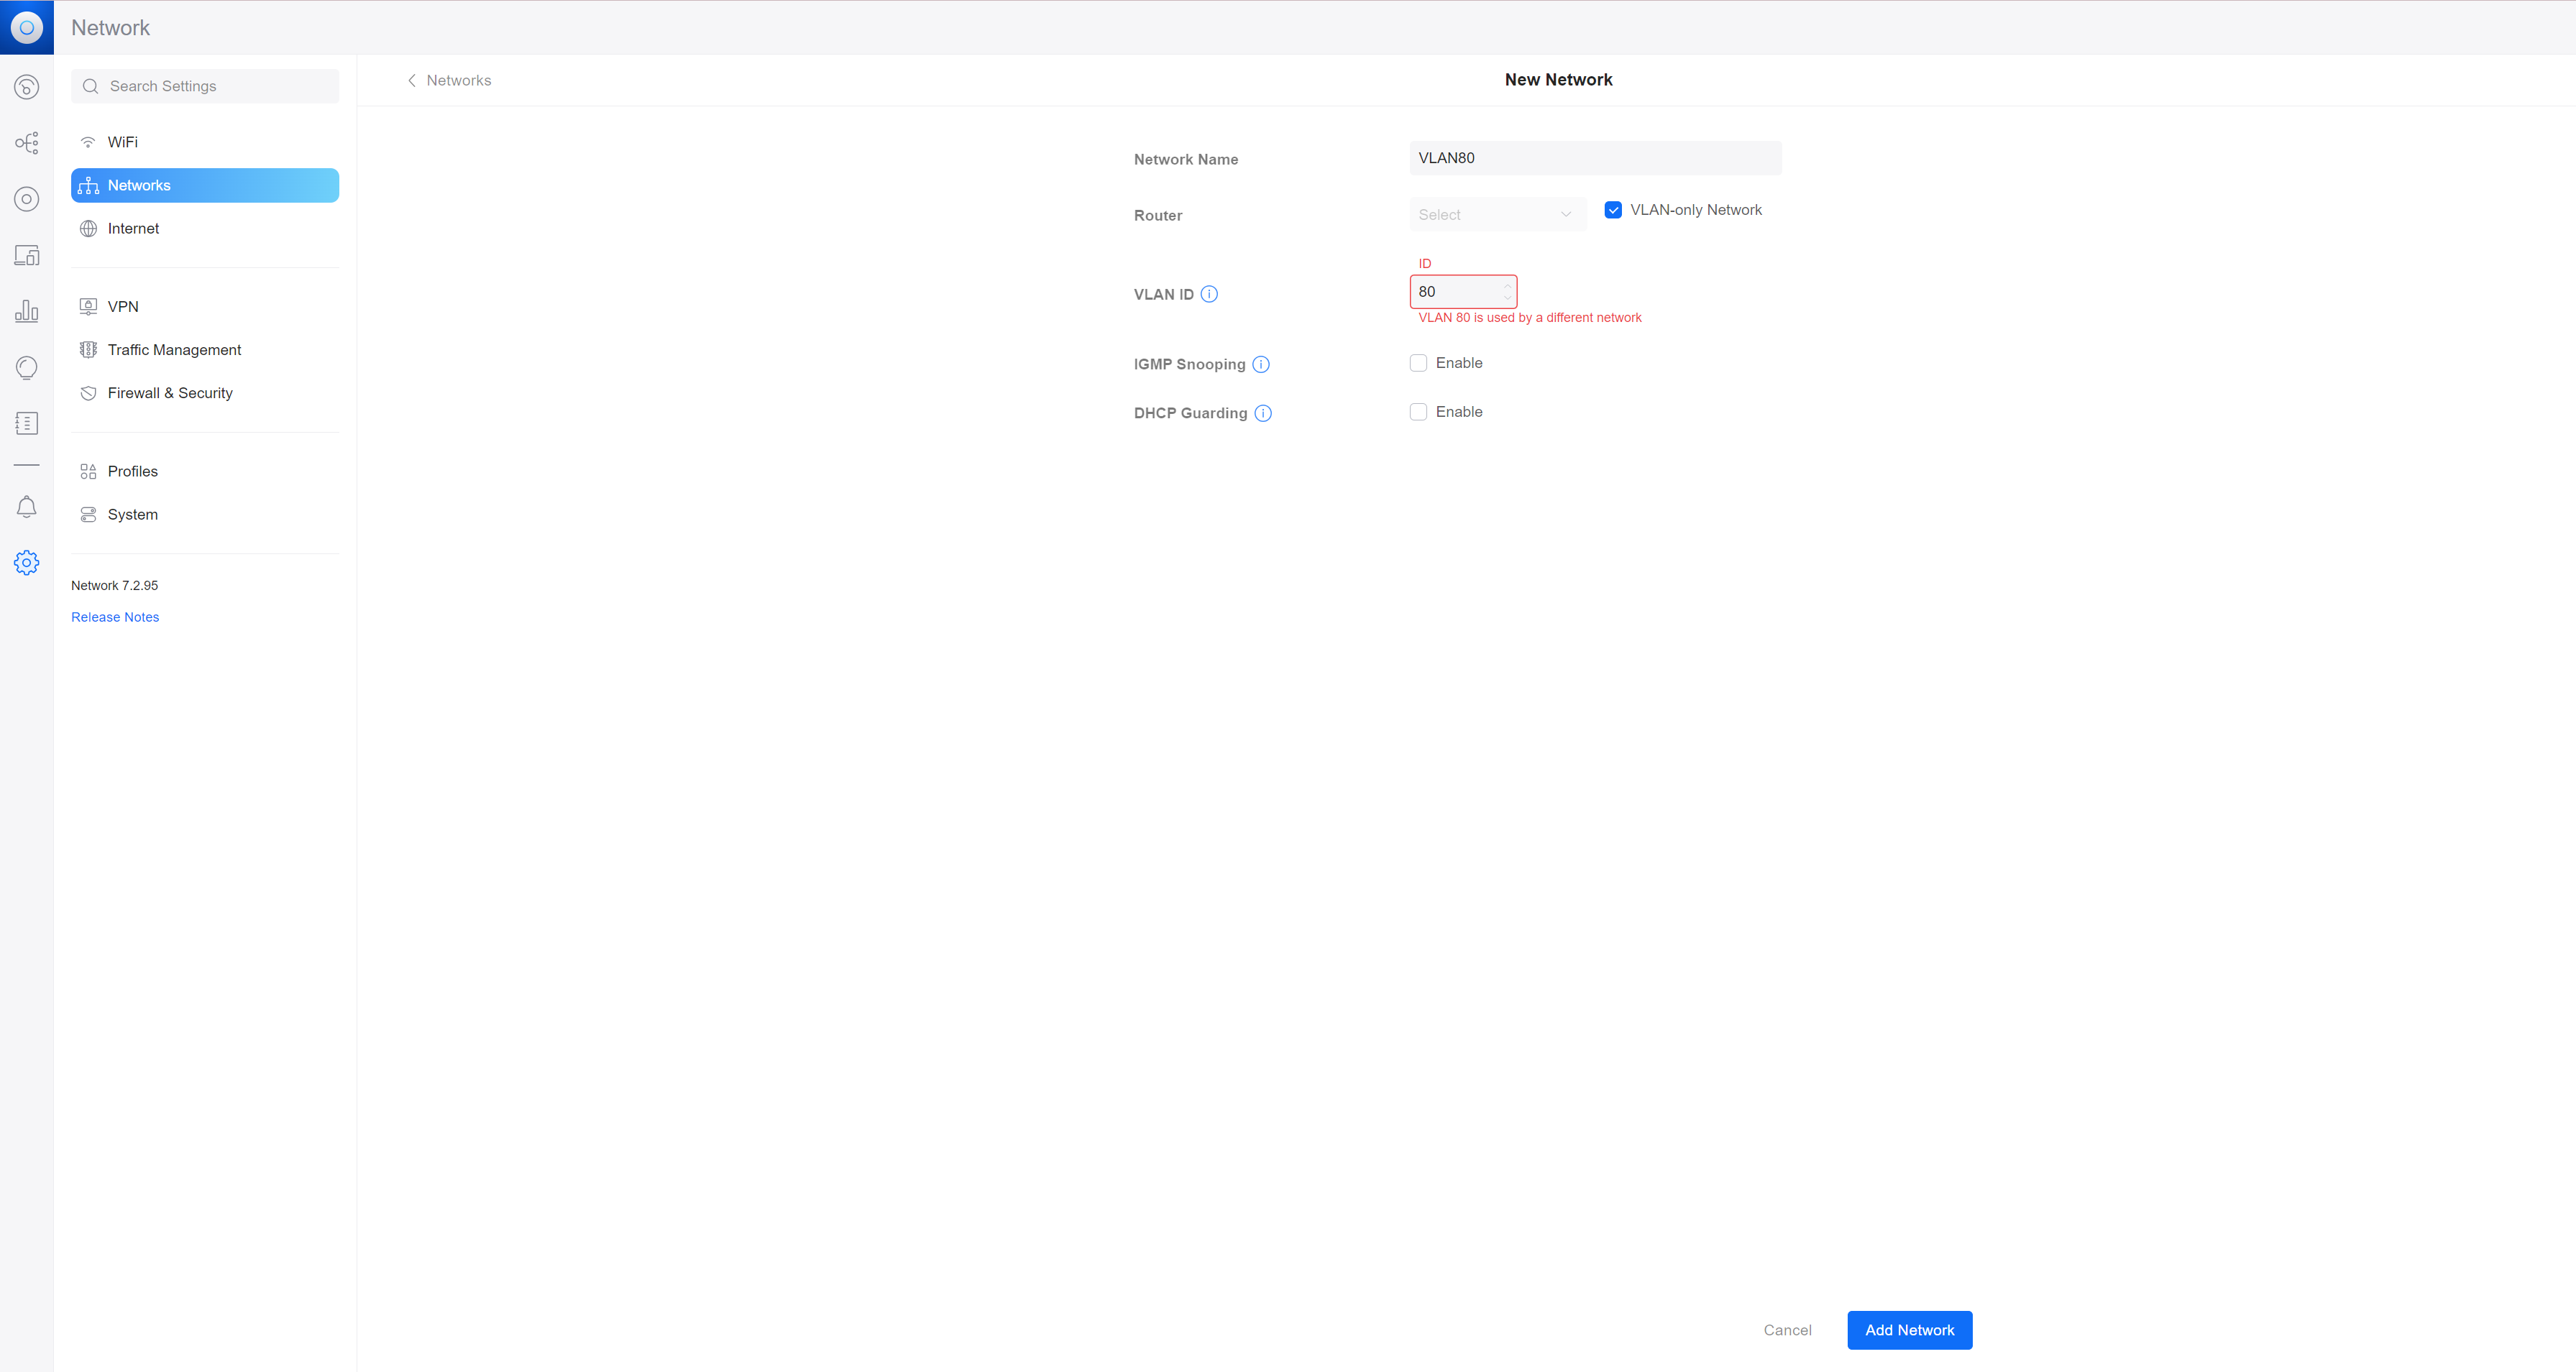
On your unifi controller, go to System / Networks.
Create a
VLAN-onlyUniFi ‘Network’, specifying the same VLAN ID as set in pfSense (in my case,80- these MUST MATCH between UniFi & pfSense!).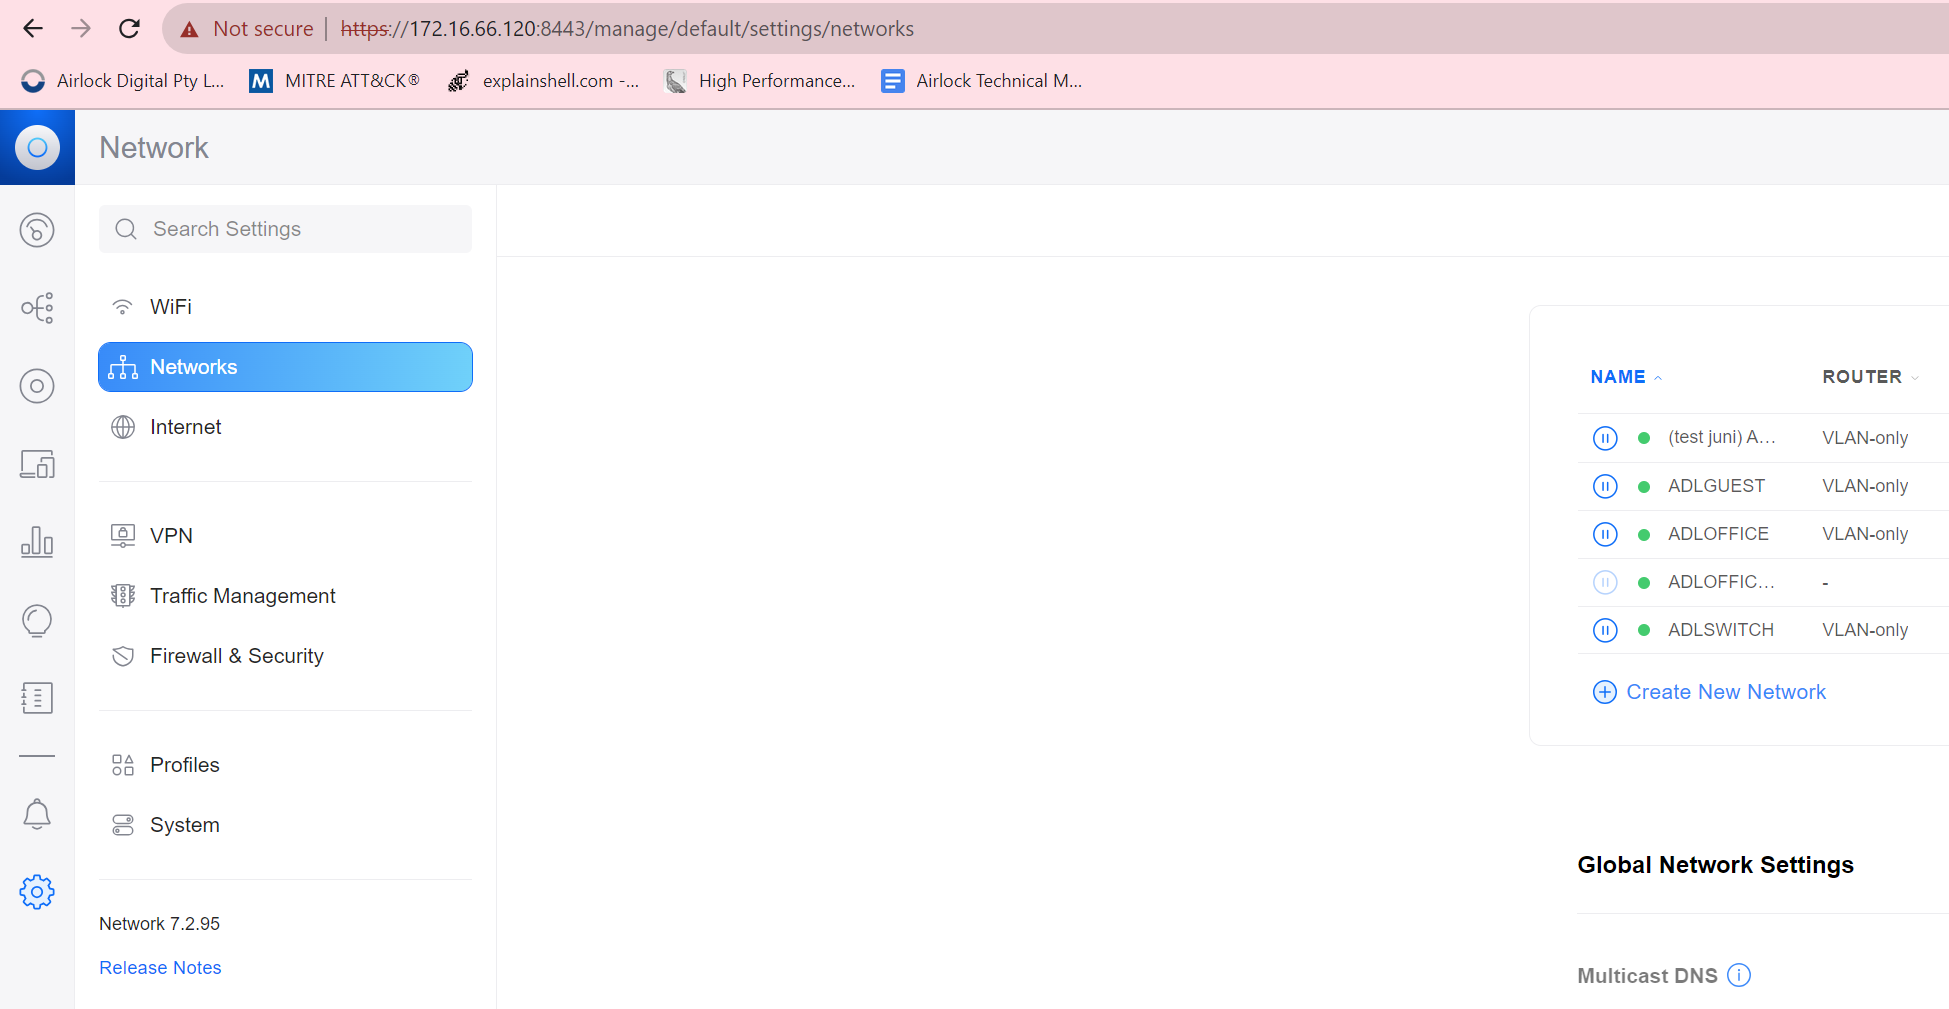
-
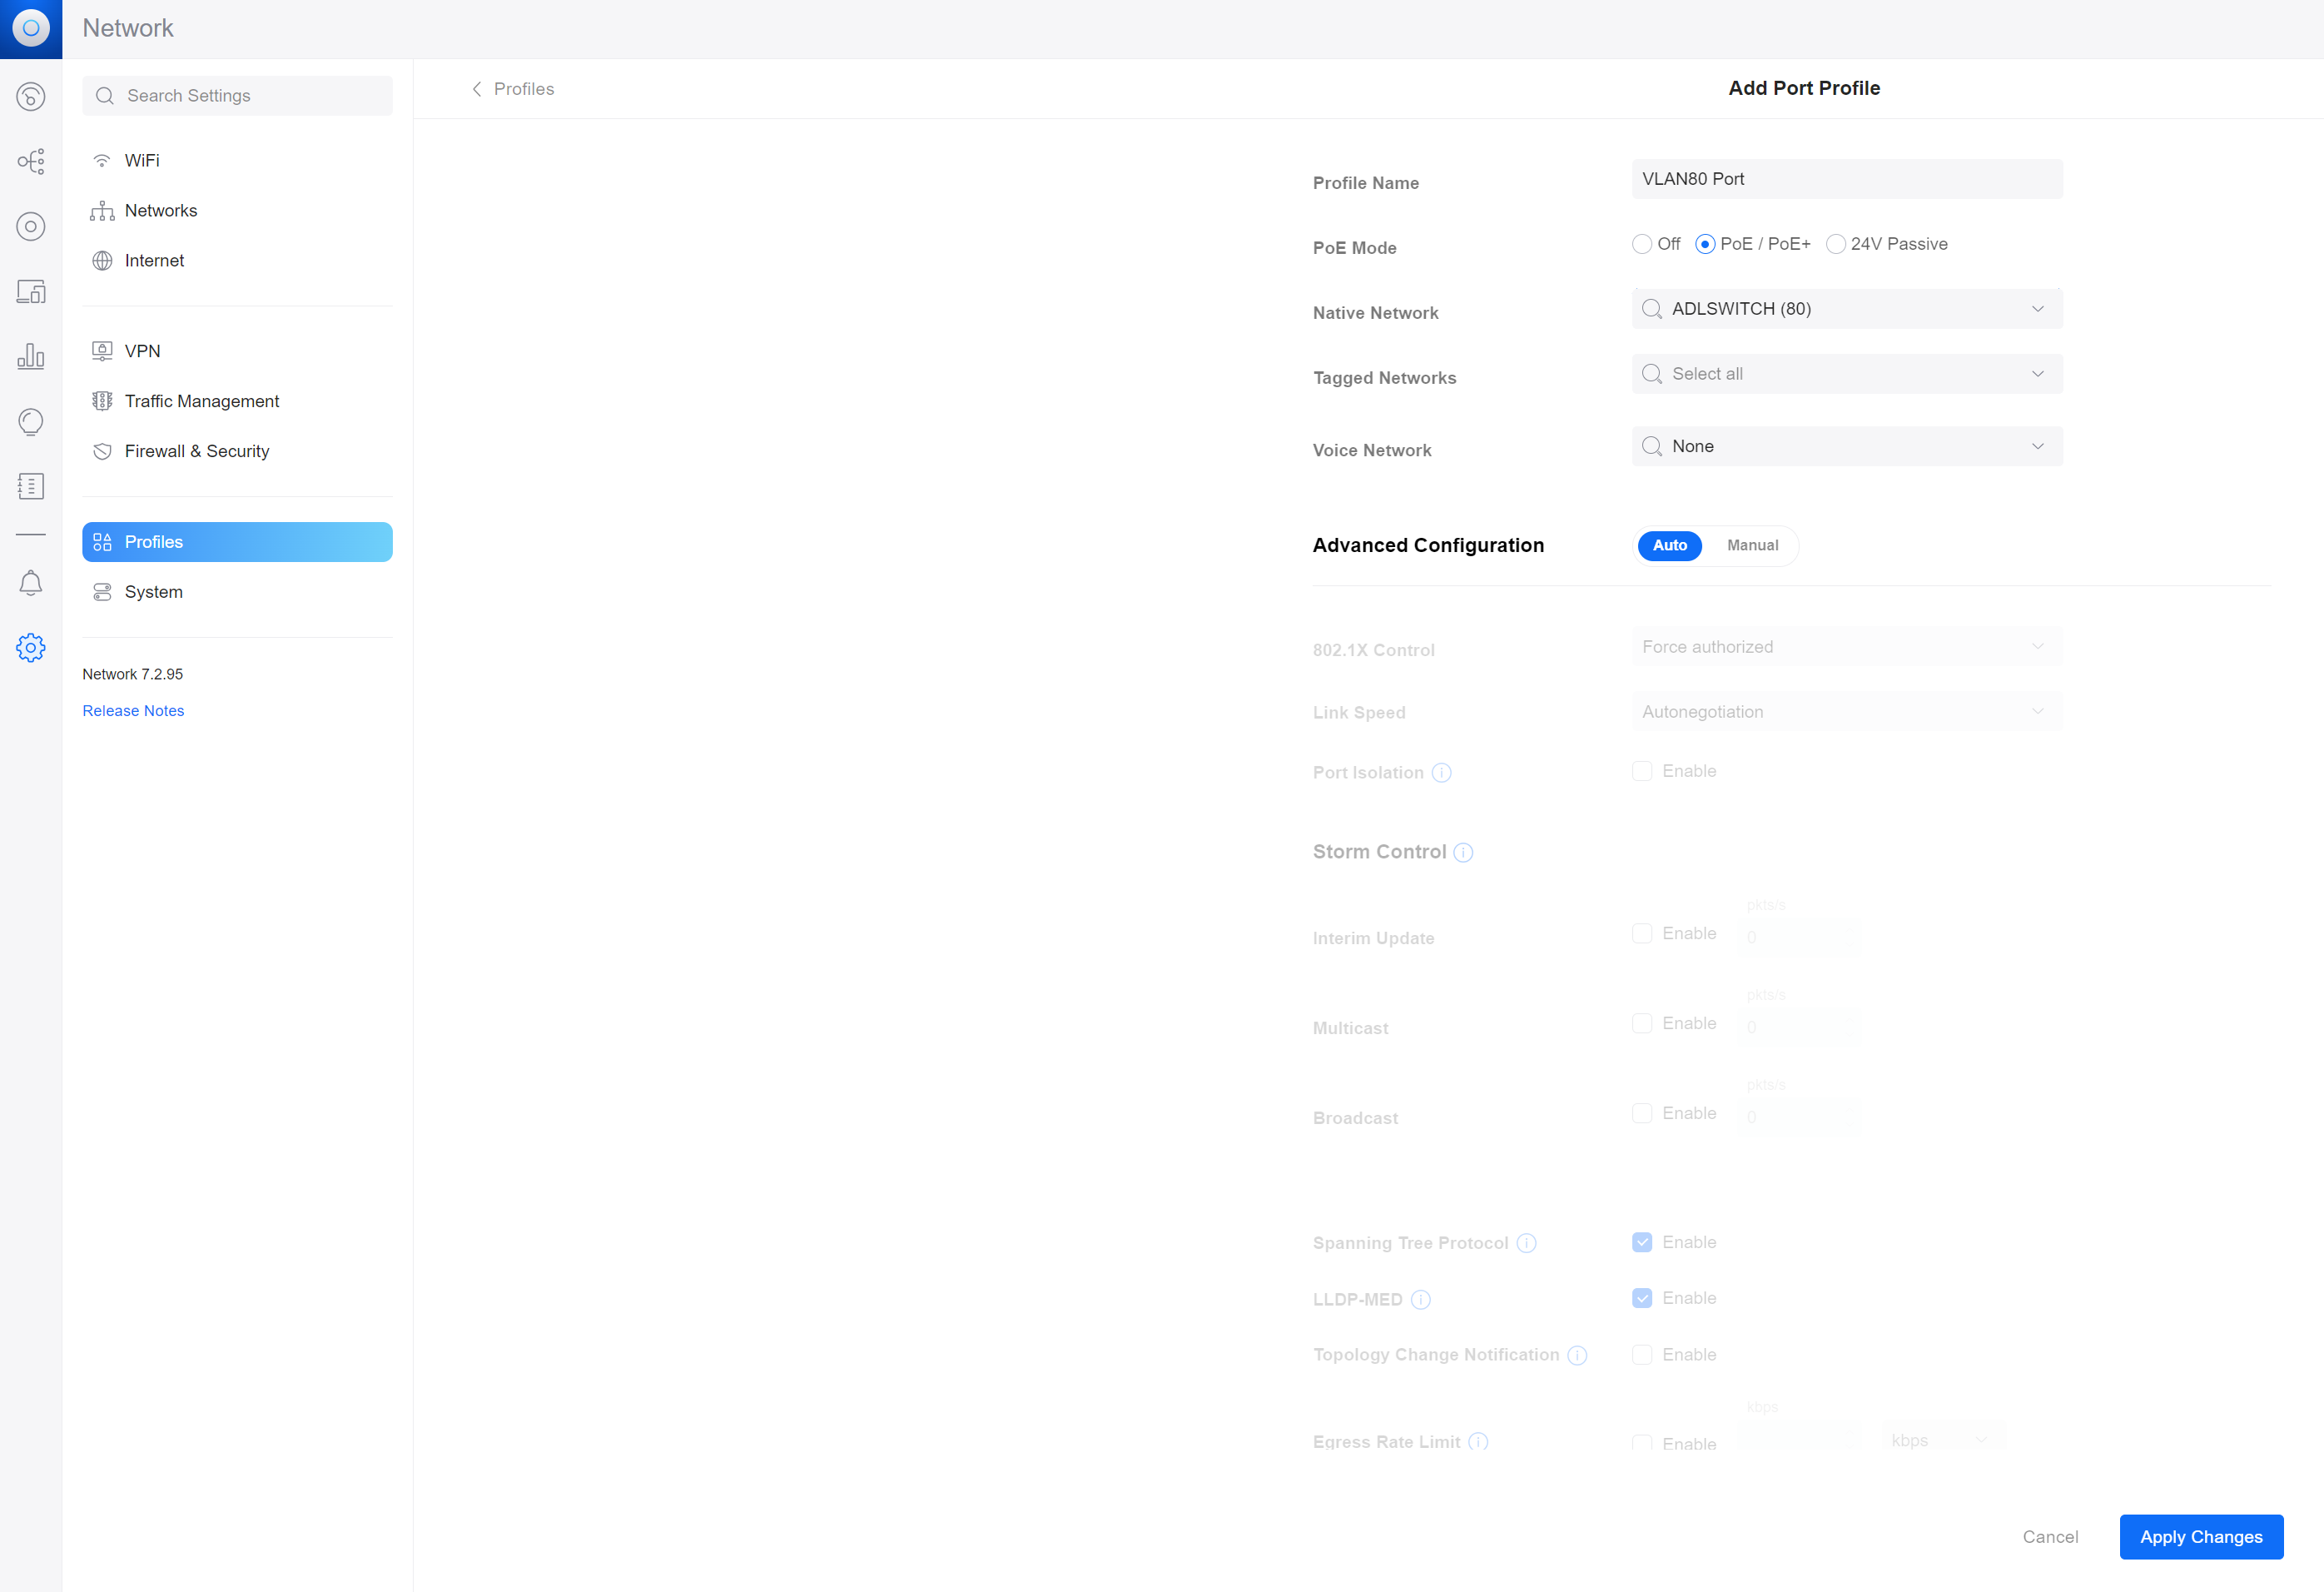
Go to System / Profiles.
Here, create a port profile with the native network being set as whatever VLAN-ONLY network you want all passing traffic tagged as. E.g. by setting the native network to the UniFi network we just created will add the
VLAN 80to passing traffic, BEFORE it reaches the pfSense.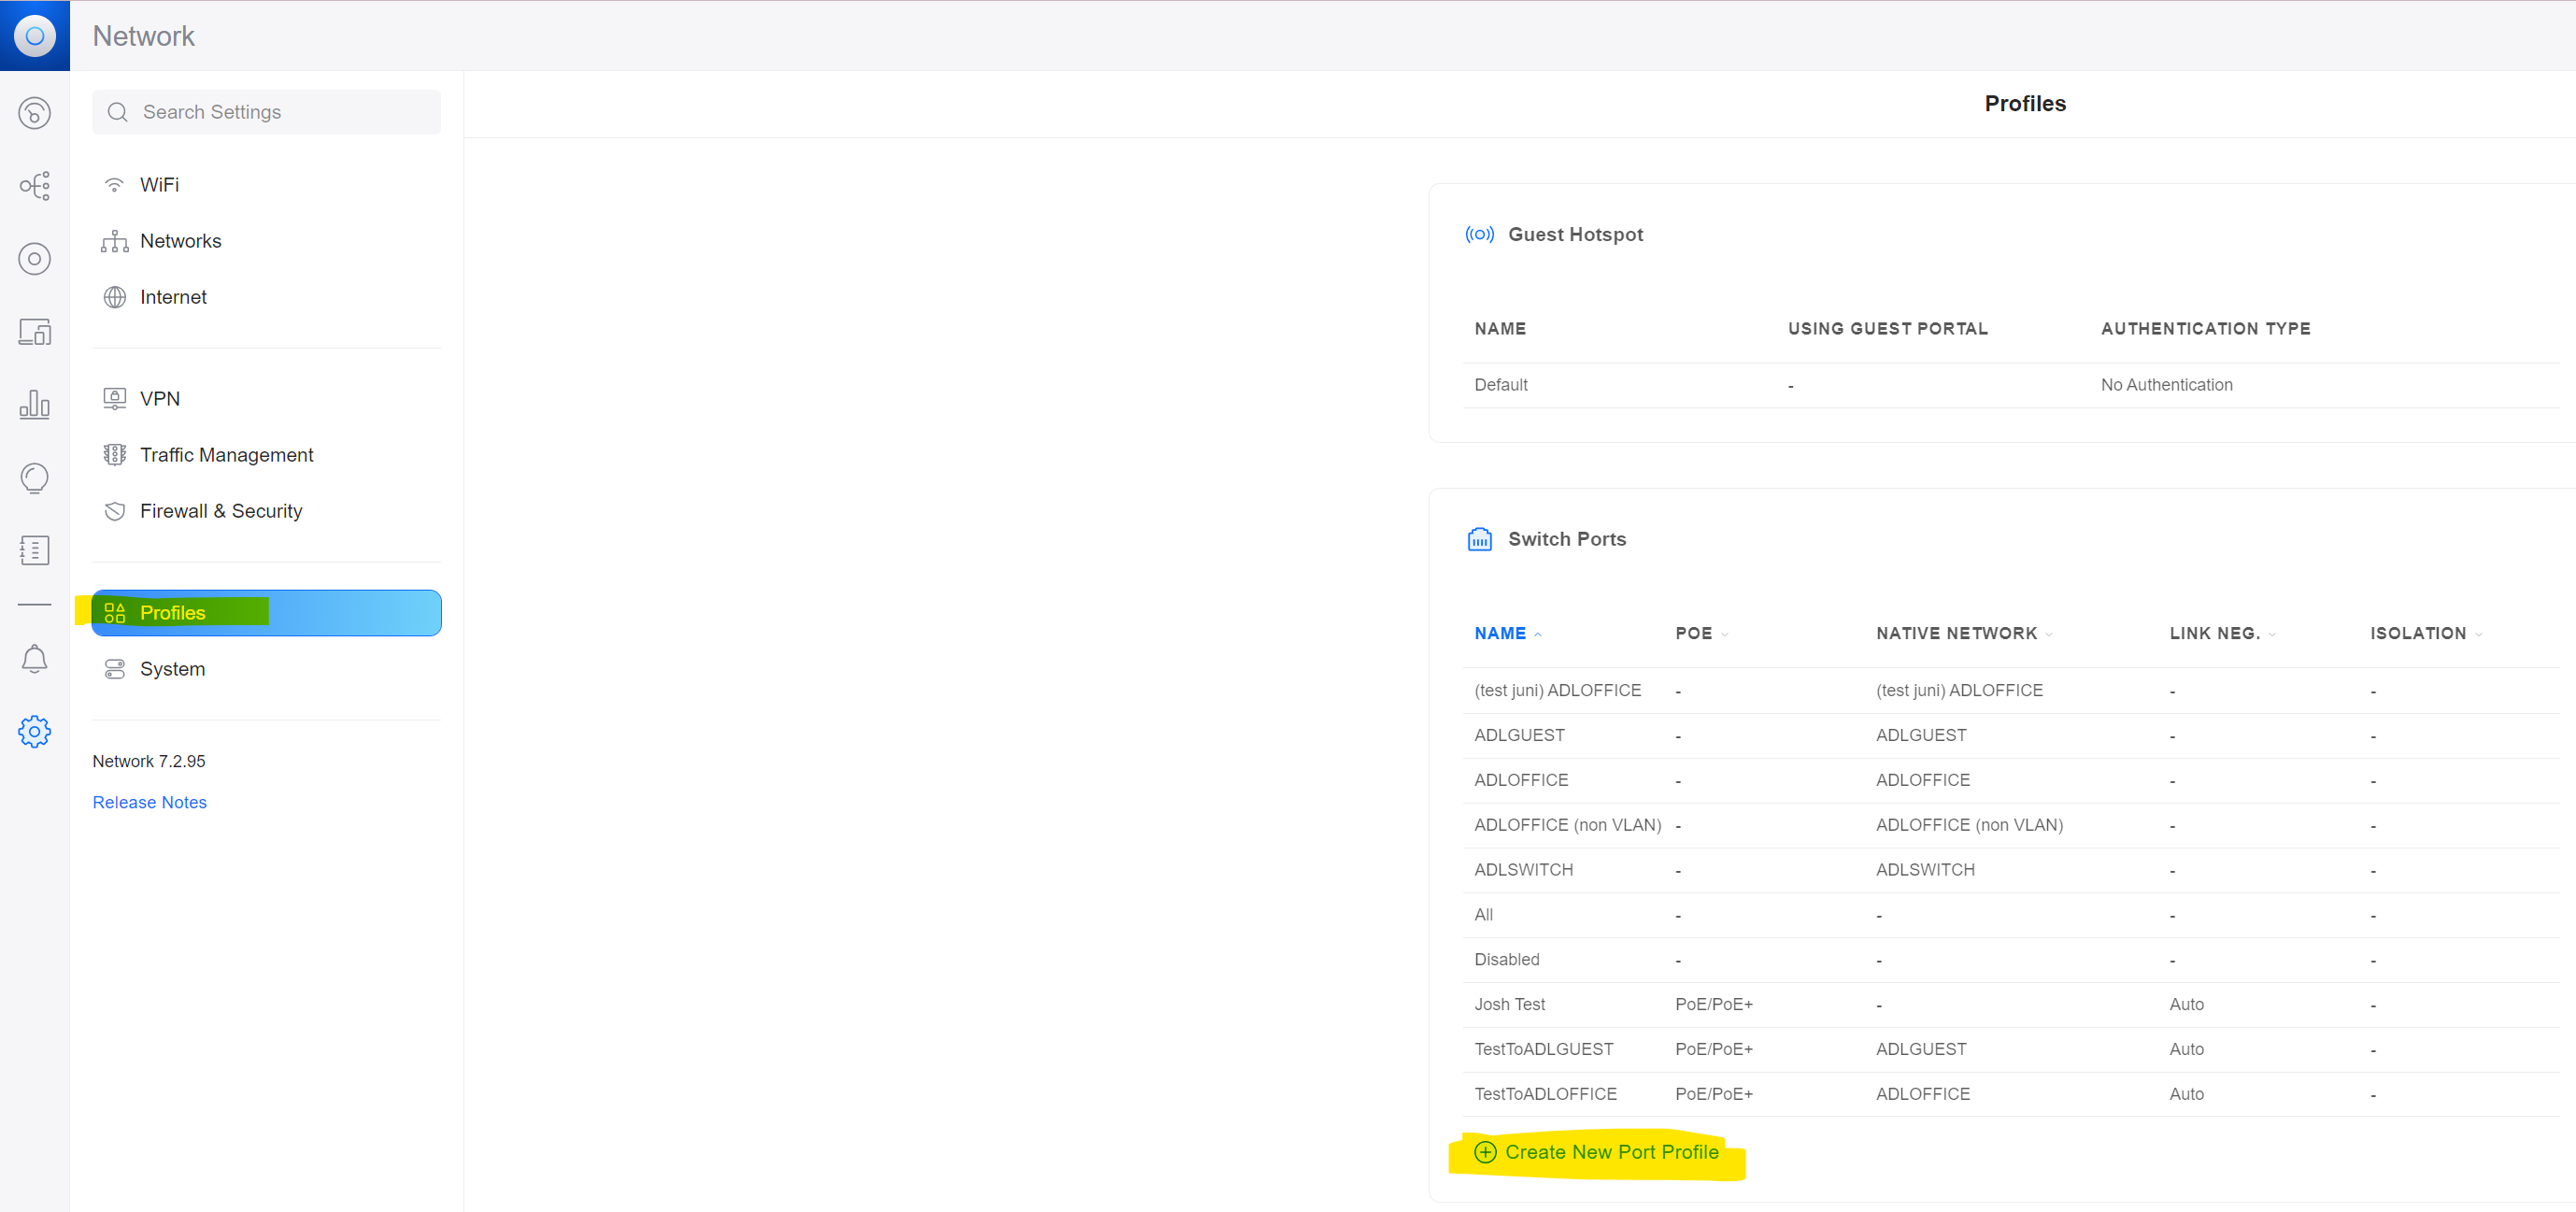
-
Recall from Step 3 that we configured ETH3 to add a VLAN tag of
80(matching itsPort VID) to all UNTAGGED traffic passing through it by default.Thus, to allow a device hooked up to the switch to be assigned & routed to a different VLAN (VLAN 75, per say) you MUST remember to go to Interfaces / Switches / VLANs and ADD whatever pfsense port the switch is connected to (ETH3 in our case) to the ‘members’ section of the corresponding VLAN (e.g.
VLAN 75)If the traffic is arriving pre-tagged by the switch, make sure to add the member as tagged.
See below: now BOTH ports
ETH3Ð7are configured to let through traffic tagged with VLAN 75.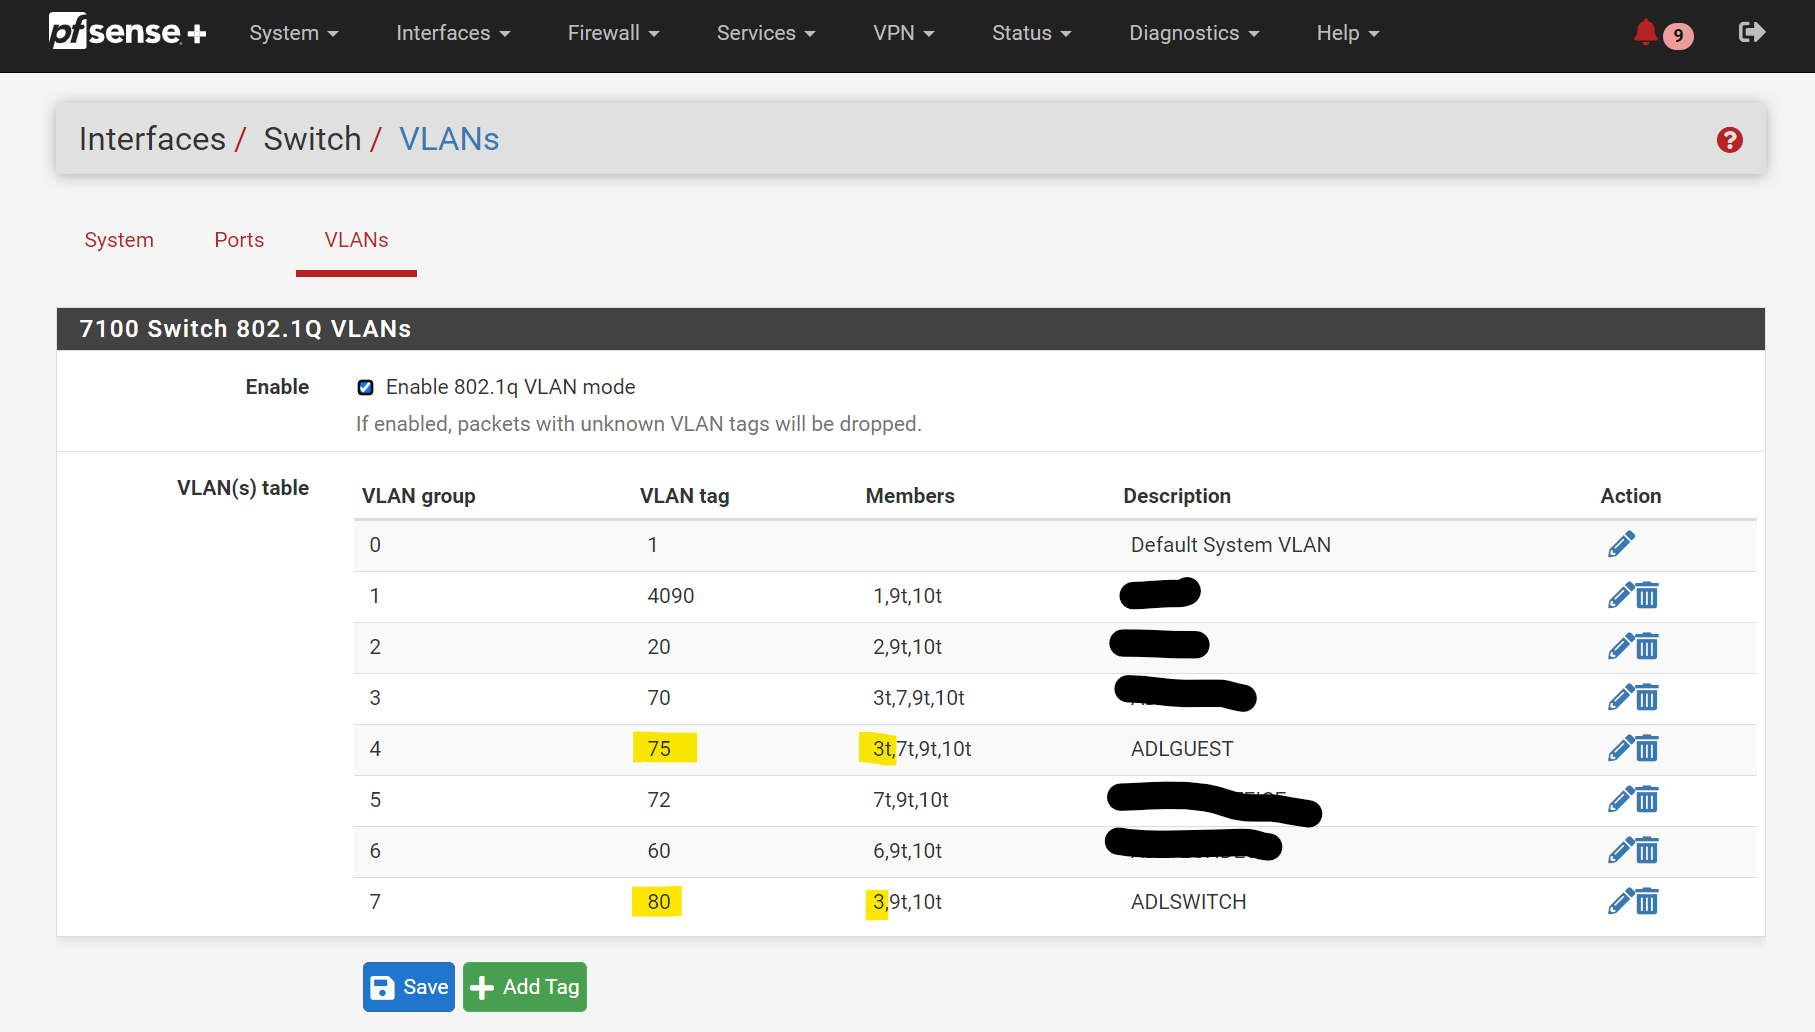

- And now… you’re done!
Now you should be able to use a UniFi switch to tag traffic coming through particular ports with specified VLAN tags, & have it routed to the corresponding VLAN network on the pfsense!

DISCLAIMER: I would consider this a LEGACY POST of mine, written a long time ago. Please excuse any typos, errors or lapses in memory/judgement - as it was added to the site from the archives, just to put everything in one place. Thankq for your understanding 🙇♀️